
As a digitizer, some of the questions I’m frequently asked are, “How do I convert a JPG to a PES file? What software do you recommend for creating my own designs?” I usually answer by letting the person know that there’s not really a way to simply “convert” a graphics format to an embroidery format and end up with a usable design. They are two totally different types of files. Graphics files are made up of shapes and objects (vector) or pixels (raster/bitmap) and embroidery files are made up of stitch commands that tell the machine when to start, stop, change colors, what length of stitch, what direction, and many other variables. Graphics files need to be digitized for embroidery, preferably by a skilled and experienced digitizer. IMPORTANT: Before digitizing an image or having it digitized or tracing it for any other use, please, please, please be sure you have the proper license/permission from the artist. Not only is it respectful, it will prevent expensive and time-consuming legal troubles down the road.
Ahhh, but there *is* a way to convert and it’s called auto-digitizing and there are quite a few programs out there (and even machines!) promising to easily convert your graphics to embroidery files with a few clicks. Prices range from a few hundred to a few thousand dollars.
I know from interacting with customers that many crafters who are familiar with vinyl and digital cutting are entering the embroidery world. These crafters are looking for a quick trace function similar to what exists in vinyl/graphics.
So, let’s look at some embroidery files that I created from high-quality vector .eps clipart. I used Wilcom’s Embroidery Studio software which is a top-notch professional program. If this was a raster file instead of a vector, some additional steps would need to be taken to reduce the number of colors in the design. Some common raster graphic formats are jpg, png, bmp, and gif. Some common vector graphic formats are eps, svg, dxf, ai, and cdr.
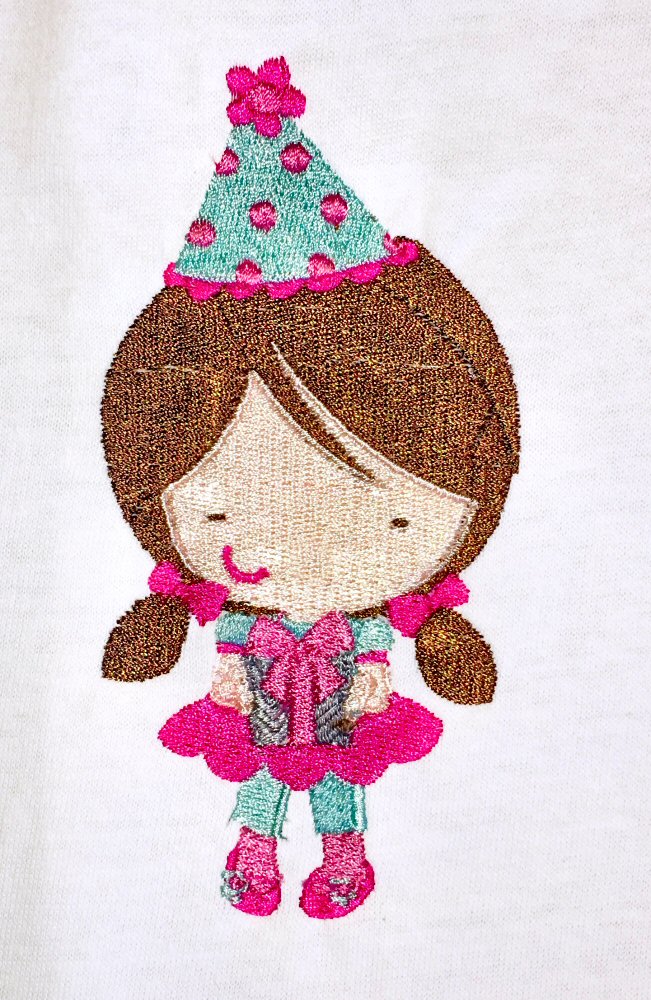
This design was auto-digitized. This is what you can expect if you want to simply “convert” graphics to stitches. I imported the graphic file into my Wilcom software and clicked around a few times to convert the image to stitches. The software decided what type of stitch to use, what angles to use, what underlay to use, and so on. This is as simple as it gets. What I ended up with had 6 colors but nearly 100 color changes so I sorted the colors into 9 steps and 6 colors since I planned to stitch this design. This design took about 10 minutes to produce from start to finish. The software pretty much did all the work. To be fair, I also ran the same image through Brother’s PE-Design Software “Image to Stitches” function. You can see the results HERE. 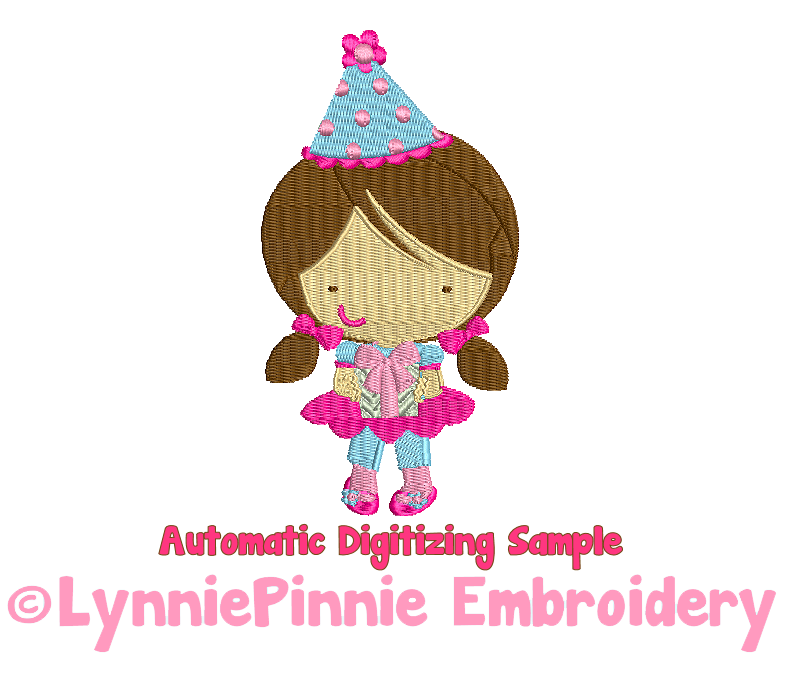
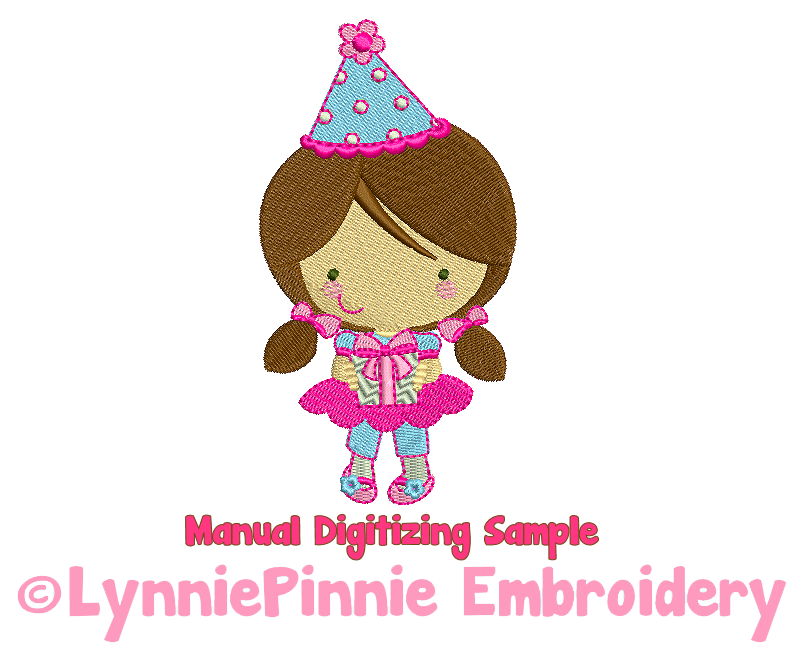
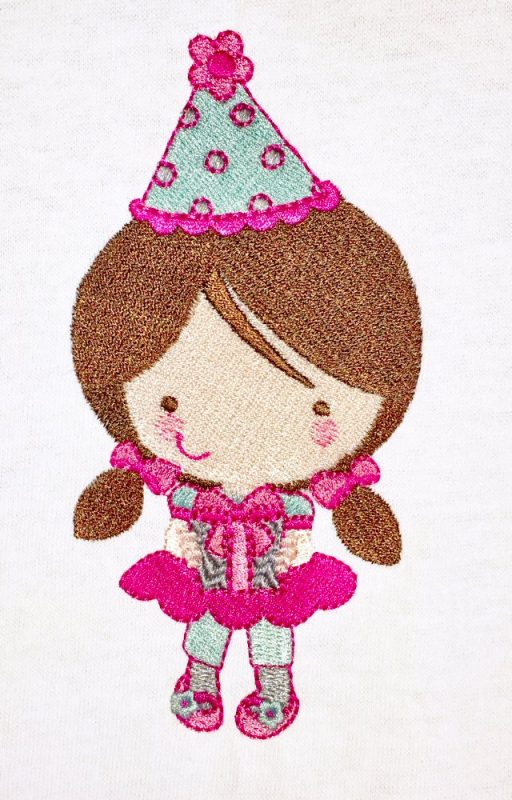
Next, I took the same image and imported it into a new file in my software. I didn’t convert or change anything. I used the graphic as a guide to create my embroidery design. I manually drew each element of the design and applied my own settings for start and stop, stitching order, stitch direction, stitch type, underlay, etc… If you’d like to see that process we have a video you can watch HERE. This took over an hour from start to finish (and I have nearly 10 years of digitizing experience and around 20 years of graphics experience).
Let’s take a look at how these designs stitch. I am going to use the same stabilizer, thread, materials, and technique for both designs so the only difference is the digitized file. The stabilizer is a 2.5 oz cutaway, the material is knit t-shirt hooped with the stabilizer, the thread is 40wt polyester embroidery thread, and I used my usual Organ 75/11 EEBR needles on my Brother 6 needle embroidery machine.
Here’s the auto-converted design first. There are jump stitches as a result of the software applying the lock stitch, trim, and jump settings instead of the digitizer (me). The circles ended up being stitched over. Very strange. 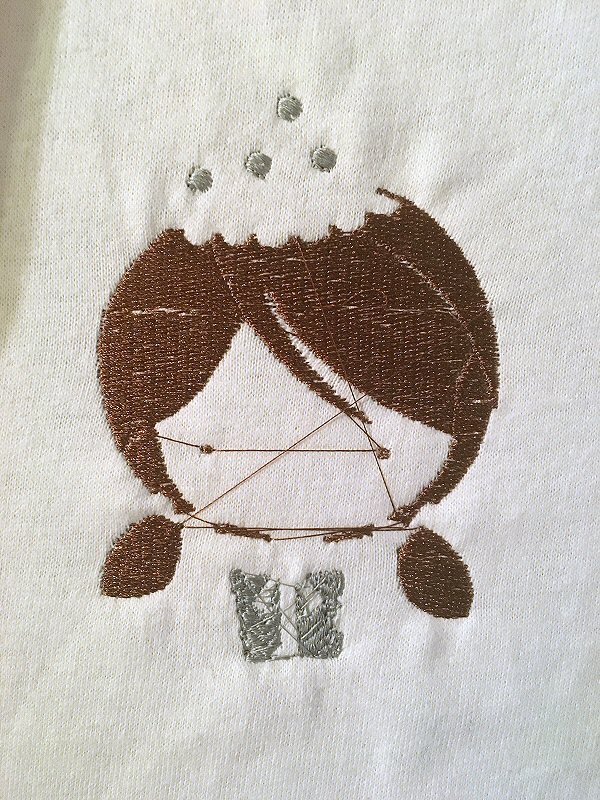
Stitching is gappy as a result of the software applying the settings for stitch direction, pull compensation, underlay, and density.
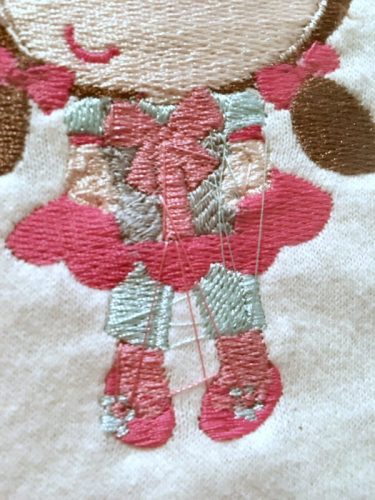
It really just doesn’t look very nice and since I didn’t apply the design settings myself, I don’t know if the software added the necessary tie offs that would keep this design from coming unstitched in the wash.
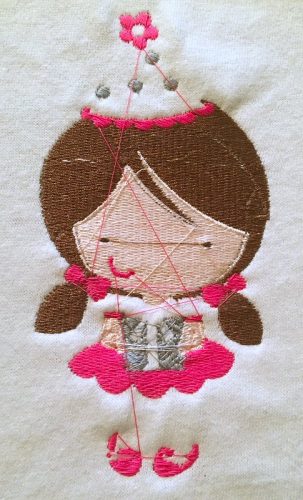
Here’s the design that I manually digitized using my knowledge and experience. My software is simply the tool that allows me to apply what I know about embroidery while creating the design. The software didn’t do the work this time. I did. No crazy web of jump stitches to trim because I digitized the design to minimize jumps and also set the appropriate tie and trim settings. Overall looks much nicer (in my opinion).
So, if you are interested in creating your own designs you should know that there’s no easy button, no tracing or converting is going to give you something usable unless it’s a very simple one or two color vector image (and in that case manual digitizing is still going to give you nicer results in about the same amount of time). You have to ask yourself if you would rather use a professional digitizer to provide you with ready-to-stitch quality files or if you’re truly ready to invest financially in a digitizing program and then commit your time to learning digitizing concepts and applying them in your software. Watch our video and if you decide that digitizing is something that interests you, look for a full, manual digitizing program that allows you to create the design yourself with your own settings instead of just auto-digitizing for you. Look for a program with online support or dealer support. Understand that your software is only a tool and that your knowledge of digitizing is what’s going to allow you to produce an awesome design. I hear from SO many customers who invest time in digitizing software only to find themselves disappointed that the software doesn’t do the work for them.
I hope you enjoyed and learned from this post. Happy Stitching!

Website: www.LynniePinnie.com
Where did you learn to digitize? Are there courses somewhere? Did you teach yourself? If so, did you have a manual or course book? I don’t even know where to start, and I would like to be able to digitize my own things. I have PE-DesignNext, and I’ve played with the auto-digitizer portion, but I have no idea how to make adjustments to a design.
I am mostly self-taught but I have also studied digitizing theory which is not specific to any software. It’s more complicated to try to adjust an auto-digitized design than to simply start from scratch by manually digitizing. Take the time to learn what each manual feature does does and how that translates to stitches. First learn what makes a design stitch well and then learn which tools to use to accomplish that in your software.
What software to digitize do you use or its more user friendly ?
Crafty has a class for PE Design Next. I am taking it and learning a lot. She also has a book she has written called” Digitizing’s Sew Easy Next”.
So helpful! I knew there was a lot to it, but it’s good to see the bad next to the good. I just purchased some of your designs. Can’t wait to stitch them out! Thank you!
Thank you for your honesty! I have tried most of the programs you mentioned and some things were just…not pleasant. The “vocabulary” lesson at the beginning was the BEST! A lot of sites have thrown around vectors and other words but the don’t explain what those words mean or what file correlate to the words ( like vector). Thanks again.
Hi and thanks for explaining in such a clear and easy to understand the whys and wherefores of Digitising. I was happy to buy my designs before and now I know for sure I will continue to be!
Could you convert a file for me? I would gladly pay someone to do this. I work for the University of Missouri and they have provided me with shirts that do not fit. I want to be able to embroider on my own shirts the logo and lettering.