Beginner Machine Embroidery Projects

When you’re just starting out in a new decoration discipline, like, for instance, machine embroidery, everything can be intimidating. You worry about wasting a garment or fabric. There may be some uncertainty about what stabilizer to use. Choosing thread and bobbins may be confusing. For some people, the worry about screwing something up (which happens and is, for most, a normal part of the process) keeps them from ever pressing the start button on their machine at all. Getting the first successful project out of the way can be key to a successful career in machine embroidery. The question is, where to start? This blog post has some suggestions for simple projects that most anyone who is a novice embroiderer should be able to complete fairly quickly and easily.

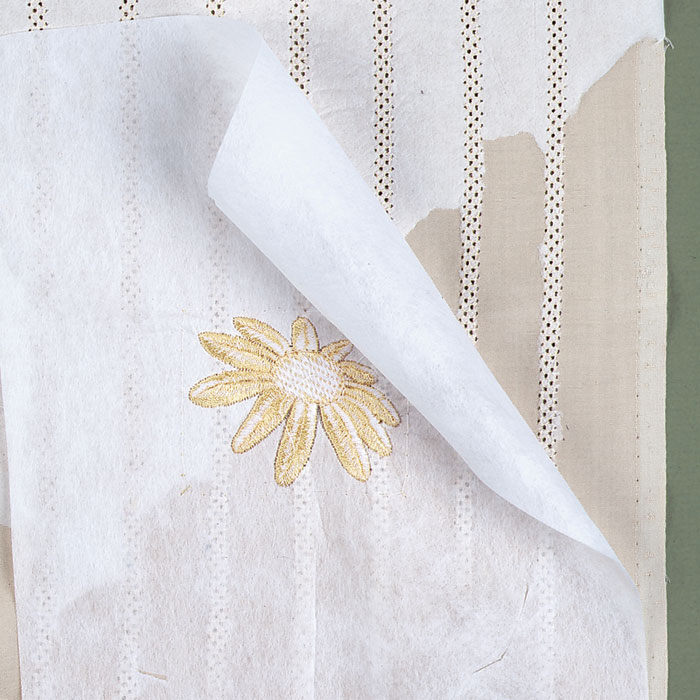
Project # 1: Towels – Towels generally fall into two categories. The first is kitchen towels, which are usually of a lighter weight fabric and generally will have no or very little pile to them. With a linen – like kitchen towel, it will most likely not be necessary to use a topping, a simple stabilizer will do. If you’re interested in doing a cute set of kitchen towels, Lynnie Pinnie has some cute kitchen themed designs and applique options that would be sure to work for your purposes. The other option for a simple towel project would be monogrammed hand towels for a guest bathroom or a housewarming gift. These sorts of towels will have a pile, so you will need to use both a stabilizer and a topping. Hand towels lend themselves nicely to monograms, and you can find some wonderful monogram frames and fonts here on LynniePinnie.com.

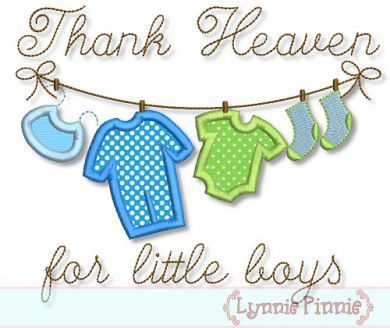
Project #2: Burp Cloths – A burp cloth is another easy project and a useful one as well, either as part of a gift set for a new mother at a baby shower, or as something you can embroidery and sell in your online shop. As with towels, burp cloths aren’t generally difficult to hoop and may or may not have a pile, depending on which type you choose to embroider. If you are embroidering a lighter density design, you may be able to use a tearaway stabilizer. Heavier, more dense designs are going to require poly mesh stabilizer or a cutaway. Remember, you want to be sure your stabilizer can handle the stitches in the design because you want to avoid the design puckering when it’s washed. If you think burp cloths might be your niche, Lynnie Pinnie has a variety of baby themed designs that can keep you happily embroidering burp cloths for quite some time.

Project #3: Baby Blankets – Keeping with our theme of easy baby shower gifts, a monogrammed or embroidered baby blanket is a lovely gift for any mother to be or new baby. While blankets might be a slightly more advanced project, they are still fairly simple and easy to embroider. Karlie Belle, one of the lovely instructors at Virtual Applique Getaway this year, has a wonderful step by step tutorial on how to add a name to a baby blanket, that may be helpful for those who have never done this before. And if you’re looking for some adorable applique options to add to a blanket, Lynnie Pinnie has you covered!

Project # 4: A Winter Scarf – Like most of the projects mentioned in this post so far, scarfs are flat, so they’re fairly easy to hoop. They also tend to be made of a substantial fabric, but not too thick, so hooping shouldn’t be too tricky. Scarves also lend themselves nicely to a monogram for a classic look, or to an applique if you’re inclined to get a bit more fancy. If you’re looking for products to sell at craft fairs or online, scarves can be a good bet there as well. As with the other season, winter themed designs are available from Lynnie Pinnie and will be sure to make your scarf project a success.

The main thing to remember when starting out is that mistakes will happen, and that everyone makes them. Don’t let the fear of screwing up a project keep you from learning all that your machine can do. Find tutorials, ask questions in groups (we’re happy to answer questions and help in the Lynnie Pinnie group) and keep practicing with your machine. You’ve invested the money to buy the machine and the time to learn to use it, so don’t let anything hold you back from creating amazing embroidered items!

Stabilizer Basics

As a singing nun in Austria once advised, the best place to start is at the very beginning, so the first thing we’ll discuss is the basic categories of stabilizer. As with most things, the basics can quickly get a little complicated, as each basic category can split into subcategories that contain stabilizers with more specific uses. In order to make this as easy to understand as possible, think of it like building blocks. You learn the basic categories, which are your foundation, and then move on the the more specific options, often called specialty stabilizers or backings, which might have a less broad application or may even be applied only to one specific type of job.

At the most basic level, there are essentially two categories of stabilizer, cutaway and tearaway. As the names imply, tearaway stabilizer can be torn, while cutaway requires removal with scissors. Pretty much every type of stabilizer falls into one of these two categories. The exception to this rule would be water soluble, which requires water to be removed. Water solubles are a popular option for patches or free standing lace and also tend to be toppings. A topping is a stabilizer that is used to keep stitches from sinking into pile fabrics. It is a useful option for those embroidering towels or fleece.

For many embroiderers, tearaway seems like the optimal stabilizer solution, mostly because removal can often happen fairly quickly, since the excess stabilizer can easily be torn away. A quality tearaway, one that is well made, will tear quickly and cleanly. A tearaway stabilizer that is of lesser quality or less well made, won’t tear cleanly and often will leave fuzzy edges that can fray or make the embroidery look untidy. A quality tearaway will also stabilize effectively and hold stitches firmly, but only require a minimum amount of force to tear. A tearaway that requires yanking hard to remove excess stabilizer runs the risk of pulling stitches and distortion of the finished product.

Tearaway stabilizers generally come in three options: light weight (1.5 or 1.8 ounce), medium weight (2.0 or 2.5 ounce) and heavy weight (3.0 ounce). In some cases, the medium and heavy weight options may also be called “hat” or “cap” backing. The name comes from the fact that these weights will most often be used when embroidering a hat. The stabilizers known as cap backings are heavier weight, usually stiffer and more paper-like, which means they can stabilize heavy fabrics and tear sharply and quickly.

Cutaway stabilizers, as the name implies, will require a little more work to remove. All cutaway stabilizers will require cutting away the excess stabilizer as the method of removal. Some embroiderers prefer to cut close to the stitches while others will cut as far away as possible from the stitched design. A common trick is to cut the stabilizer to slightly larger than the design, which lessens the need for cutting after the embroidery is completed.

Cutaway stabilizer is a popular option for use with lighter or stretchy fabrics as it provides the fabric with increased stability. Embroidery on heavy weight fabrics like sweatshirt material, or jackets, can also work well with a cutaway stabilizer. While there are light weight cutaways available, a 2.5 ounce cutaway is considered by some to be the universal stabilizer option. A 3.0 cutaway may be the weight used when embroidering heavier fabrics, but 2.5 ounce cutaway is, for some, the only stabilizer they ever use.

The third category of stabilizer is the water soluble options, which are stabilizer, but aren’t generally designed to remain with the fabric for the long term. As the name implies, a water soluble stabilizer dissolves when water is applied to it. Only the parts that have been actually embroidered remain to do their job. Water soluble stabilizer can be a cutaway/washaway, which looks somewhat like a standard stabilizer but which dissolves in water, or it can look more like plastic. The versions that appear to be more like plastic will either be Vilene or Badgemaster, which are heavier water soluble stabilizers that are often used for badges and sometimes used for free standing lace. The other water soluble option, which has the appearance of a thin plastic, is a water soluble topping, which is used to keep stitches from sinking into towels or fleece. You may often here water soluble toppings referred to as Solvy, but that is an inaccurate description. Solvy is a trademarked name for water soluble toppings from Sulky, but has, over the years, become a more generic term, like Kleenex when used for tissue regardless of actual brand name.

Author’s note: This is the first chapter of a book about stabilizer that is in process currently. We hope to have it available for sale soon.

Words and Sayings

I’m a writer, so I don’t suppose it’s a surprise that one of the first categories of designs I was attracted to was the words and sayings category. I’m a big fan of the marriage of words and images, and Lynnie Pinnie has some really cute and fun designs that are just that. Since the site also has an enormous back catalog of designs (1600 I believe I was told was the number) posts like this also help point out some applique designs, and design categories, that you might otherwise have missed.

The “Naturally Sweet” and “Berry Adorable” designs take cute fruit to a whole new level. Continuing our theme of cute food, and also a possible adorable Valentine’s Day design, we have the “Sweetie Pie” heart applique. If you feel strongly about eating your veggies, you might want to go for the “Corn Maze Cutie” filled embroidery design. Clearly, at Lynnie Pinnie, we like adorable food.

For those who are working with religious themes, Lynnie Pinnie has a variety of word art combinations based on Bible verses and religious themes. If John 3:16 is a favorite verse, Lynnie Pinnie has it available in a word art machine embroidery design file and in a vintage Colorwork Sketch file. Proverbs 3.5 is the Scripture quoted in Tribal Arrows word art applique. You can also find Psalm 139.14 in the same Tribal Arrows word art applique design. Finally, we have the Blessed Nation, Psalm 33:12 in an applique.

While we know that boys can like dolls and girls can play football, there are just some designs that seem to lend themselves more to one gender than another. If you’re looking for “boy” designs, Lynnie Pinnie has some cute ones on offer. The “Touchdown” football applique would be adorable on the shirt you make for your future quarterback or wide receiver. The “Bro” appliques for little brother, middle brother and big brother, would be perfect for a family portrait, or as a way to introduce a new sibling. And if you have recently had a new little boy arrive, the “Thank Heaven for Little Boys” clothesline applique could be the perfect decoration for his onsie.

Photographing Embroidery

If you run an online business, one of the most important pieces of the puzzle when it comes to selling is the photography of your products. Pictures that are out of focus, or fuzzy, or poorly lit, or just badly staged can sabotage sales in a way that can see your bottom line leaking red ink. Bad pictures can kill a good website design. The saying “A picture is worth a thousand words” is a saying for a reason. A good picture can sell your products in a way paragraphs of copy cannot (and I say that as someone who writes for a living and loves words). So, given that we know good product photos are important, the question becomes how do we get the best photos possible? That’s what I want to talk about a little bit today.

The first thing is to make sure you start with the best finished product you can create. That means you’ve trimmed any strings and gotten rid of any loose threads. If you’re photographing embroidery on a garment, make sure the garment is wrinkle and stain free. When planning a design/garment combo that you know you’re making to photograph, you also might want to take into account the interaction of fabric and thread. You want the end result to be one that is harmonious, but also something that showcases the embroidery work you’ve done. So take that into account.

The next thing is to create a photo backdrop. Some people will have a variety of these based on color or pattern, other people just go with something simple like a standard white backdrop. These backdrops can be purchased ready made, or can be created using contact paper or photography paper and large pieces of cardboard. You may want a couple of these backdrops. One to put under the product and one to put behind it.

After you’ve got your backdrop set up, the next task is to light your product. Good lighting is a must for good photography. Luckily, certainly since the days when the pandemic began, there are a wide range of lighting options in a wide range of prices. You can opt for something simple like a ring light, or you can purchase lights designed specifically for photography. A lot depends on your budget, how many photos you think you’ll be taking and the cost of what you’re selling. It goes without saying that you should purchase the best lighting option you can, but it’s not worth investing hundreds of dollars in lighting if your products only sell for twenty dollars or less. Even a basic lighting option is likely to be able to do the job.

After your product is staged and lit, you need to figure out what you’ll use to take the picture. Back in the day, an expensive camera was deemed the best tool for the job and in some cases, an expensive digital camera might be your best option. For a lot of businesses, however, the camera on your mobile phone can capture pictures that will be more than useful. Given how much technology has progressed and the quality of cellphone cameras, it’s entirely possible you won’t need more than your phone to get quality pictures.

Finally, after you’ve figured out your backdrop, lighting and camera options, the last thing is to stage your picture. How you stage things depends somewhat on where you’re selling. If you’re photographing things for your own website, you may just want a straightforward product shot with nothing extra stealing focus from the item you’re selling. Those who sell on Etsy and other platforms of that type may wish to add props in the photo with their product, creating more of a lifestyle picture than a simple photo of one product. Staging your product can create more interesting pictures, but avoid getting so elaborate that you obscure whatever item is for sale.

Some Designs for Winter

Since it’s just too cold here today – 14 degrees in Northern Michigan last I checked, I thought it might be fun to spotlight some of the cute winter themed designs that LynniePinnie offers. It may not be scientifically proven, but I’m sure that cuteness keeps us warm when it’s cold out. And where can you find more cuteness than on LynniePinnie.com?

First up, if you have or know a child that’s into princesses, we have a variety of winter theme princess and queen designs on offer. This winter queen design seems to have a bit of a Frozen vibe to it, if you ask me. I’m fond of this winter princess because she’s wearing a purple cloak and purple is my favorite color. You can also use this design set of seven mini princesses to make an adorable border on a top or blanket.

If you’re into gnomes, which a lot of people seem to be into these days, we have designs that will delight your gnome loving hearts. There’s this design of a gnome with a cute winter hat. Or there’s a lady gnome with cute braids and a hat that’s almost as big as she is. If you like your gnomes of the big bearded persuasion, we have you covered there too. I think this gnome has the bushiest gnome beard I’ve ever seen.

For those who are getting a head start on Valentines Day embroidery, we also feature some fancy heart designs that would enhance any Valentine’s Day theme. The motif fill swirl hearts add a bit of fancy to your embroidery. If your Valentine is more the warm weather type, this heart with palm trees may be just the ticket. This patterned heart sketch design would look adorable on a quilt or baby blanket.

If, for you, winter is all about the beauty of nature, these scribble stitch trees may suit your fancy. Or maybe this adorable snowy deer blanket stitch design needs to be added to a shirt or blanket for someone special. This moose with hearts on his antlers can be a twofer and cover both winter and Valentine’s Day. An adorable vintage winter fox could make a great addition to a mug rug or sweatshirt. Or maybe on a scarf.

Honestly, I could go on and on, but there are so many designs in the LynniePinnie catalog that we’d be here for days. The best bet is to use the search function and search whatever theme you need. My guess is that you’ll find tons of designs to suit your taste and your budget. And, keep reading this blog, as I’ll be back occasionally to spotlight some designs and suggest some options.