Do What You Love

For all that everyone these days seems to be promoting the idea of doing what you love and being who you are, we all know there are also judgy people out there. Especially when it comes to something one group likes and another does not. It could be people who don’t get your love of dark chocolate, or horror movies, or anime. Maybe no one in your orbit understand your fascination with space or superheros or horses. It can be tough when you’re the only one sharing your passion.

At Lynnie Pinnie, we’re a judge free zone. We know that there are as many ways to love things as there are things to love, and we just want to give you the designs that help you celebrate the things that resonate with you. Whatever your passion, or the passion of the little (or big) one who might be wearing or using what you make, we have a design for that.

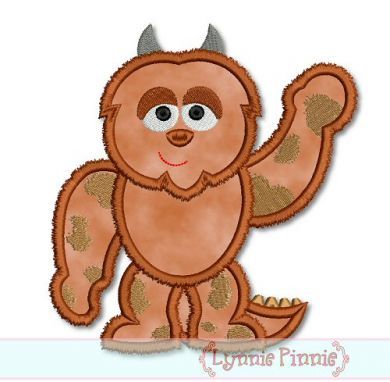
Say monters are your thing. You love the jump scare, and horror movies where the monster shows up when least expected and scares everyone to death. Or maybe you’re totally in love with Monsters, Inc. and just want to huge Sully or maybe dribble Mike a few times. We get that too. Whether you like your monsters adorable and a little silly or more on the scary side, we’ve got a design to suit your needs.

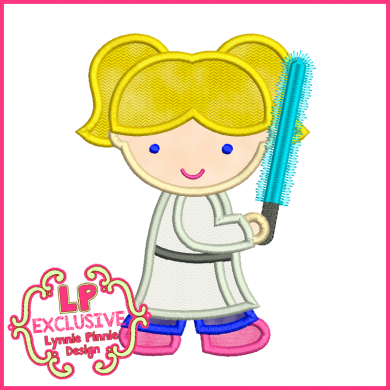
Maybe you’re really into sci-fi and you know all the Star Wars trivia there has ever been or ever will be. Since you loved it so much, you introduced it to your daughter, and now she wants to be a Jedi when she grows up. You may not be able to give her an actual lightsaber, but you can embroider one on a t-shirt for her. It may not make the right sound when swung, but it will still look cool.

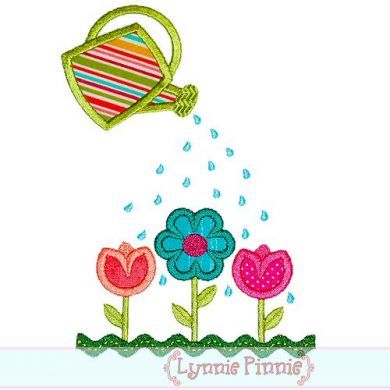
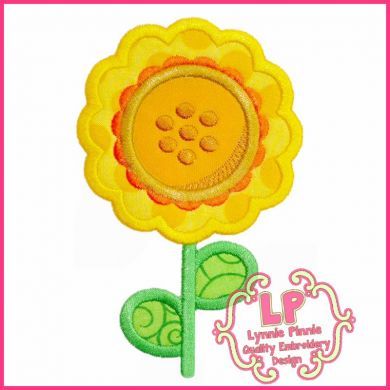
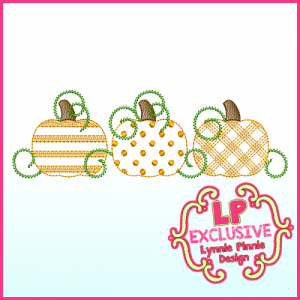
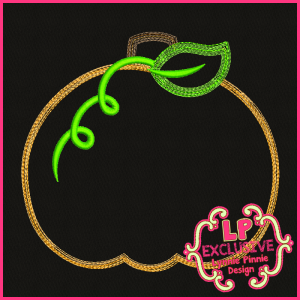
Could be you’ve always had a green thumb and your garden is your happy place. You love growing beautiful flowers or tasty veggies, and can’t wait to get outside and play in the dirct once the growing season starts. Whether it’s pumpkins or petunias, we have a variety of nature themed designs to be added to shirts, tote bags or garden aprons. Your love for gardening will be blooming all over your clothes.

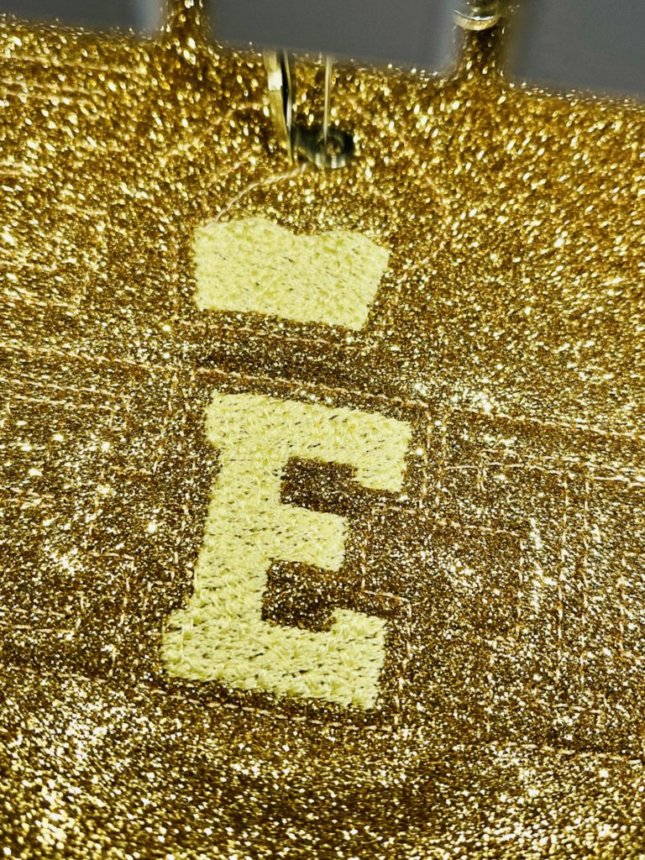
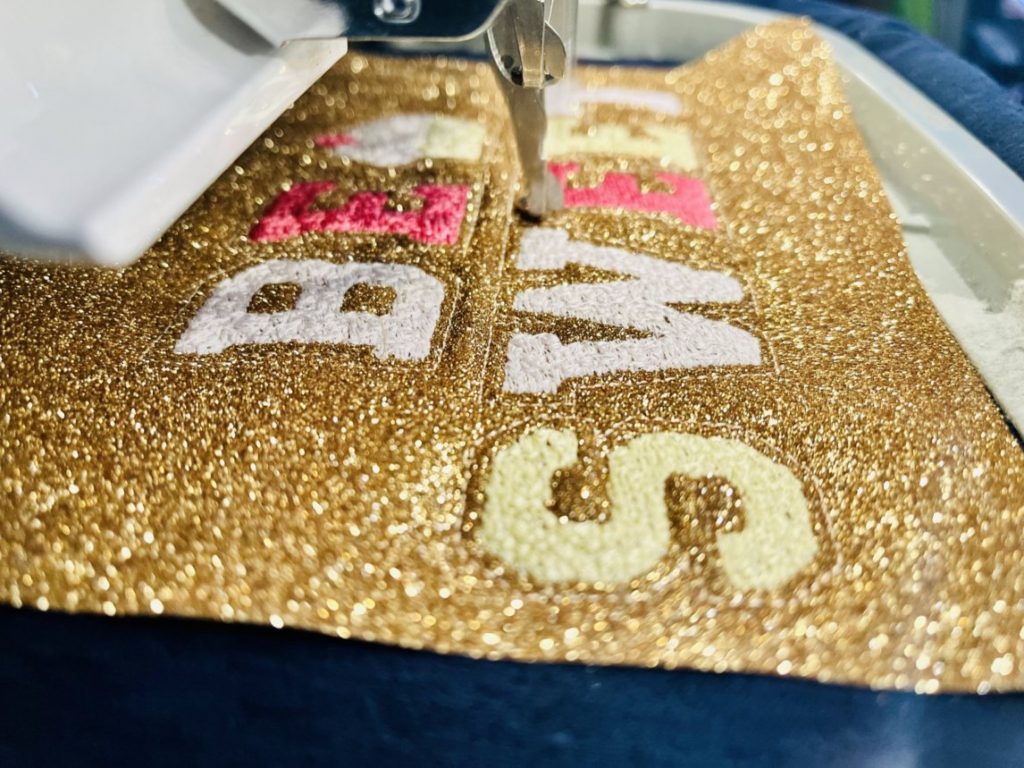
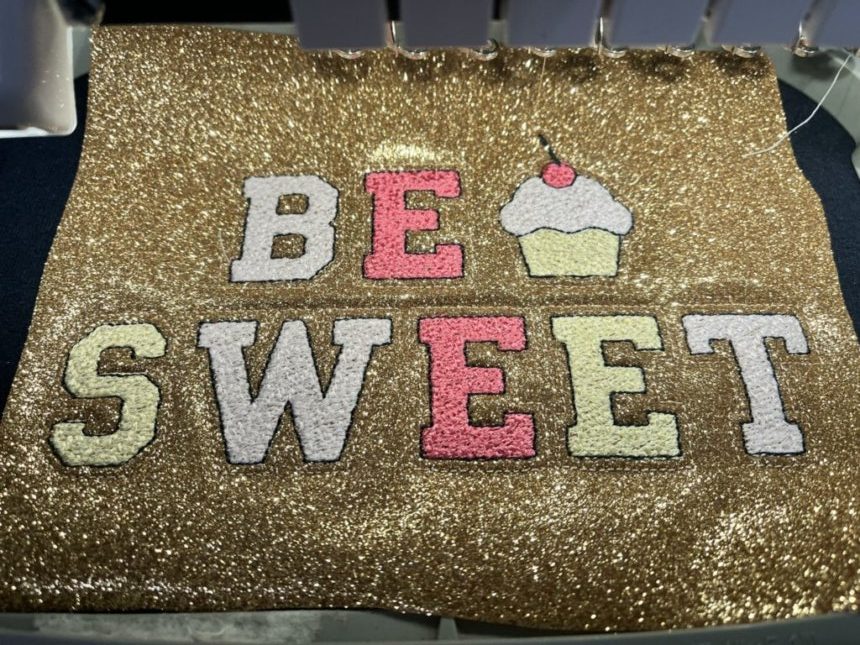
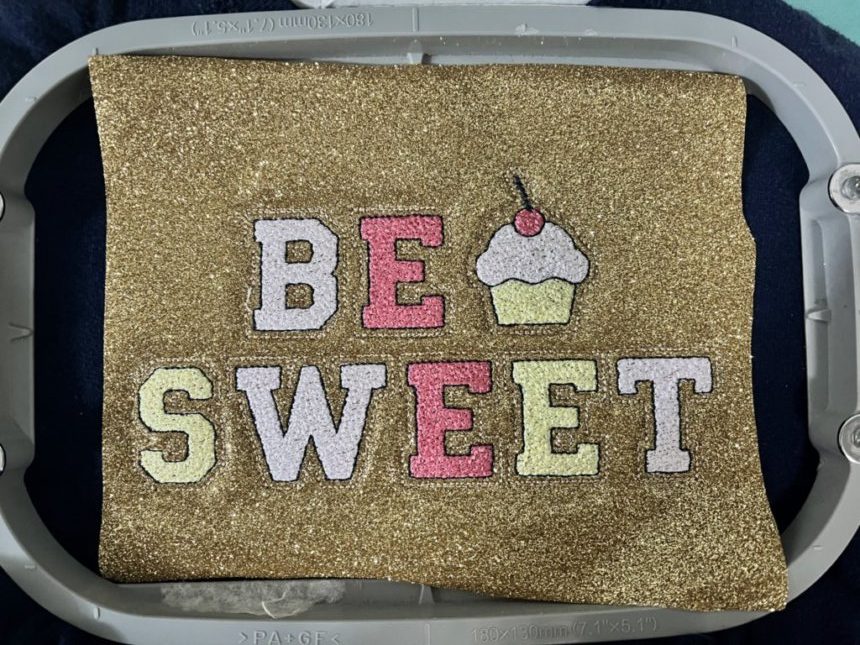
Finally, since we’re talking about things we love, I couldn’t resist a plug for Applique Getaway, an entire show built on the love of applique, embroidery and other decoration disciplines. If you want to meet your tribe and spend time with people who geek out over designs, thread and the cool things you can do with them, as much as you do, AG is the place to be. Registration is now open, so come join us!

3 Summer Fashion Trends

We all know trends change. What was fashionable last year, may not be fashionable this year, and that’s just something with which we have to roll. Also, being fashionable isn’t something that concerns everyone. Some people are just comfortable going with the tried and true or classic option. Still, fashion can be fun, and keeping up wtih the trends can add some interest and spice to your wardrobe. Adding a trendy piece of decoration can also help upcycle a piece of clothing that may be from seasons past. While Lynnie Pinnie isn’t ncessarily about fashion, we do have some designs that will help you keep up with the trends for Summer 2023.

Florals – Floral patterns and floral motifs are big for Summer 2023. Some are even taking a three dimensional role. If florals are your thing, Lynnie Pinnie is more than prepared to help. Whether it’s an appliqued sunflower or a monogram frame with a perfect rose, we have options for you when it comes to floral designs.

Heart Motifs – They say home is where the heart is, but this summer fashion seems to be where the heart is as well. Heart motifs are popping up on everything, as part of fabric design or added to hemlines. They appear to be particularly popular on dresses. Luckily, if you want to put your heart into your work (see what I did there?) Lynnie Pinnie has you covered with a variety of heart designs.

Mermaid Theme – The live action “The Little Mermaid” coming out this year seems to have inspired an interest in mermaid style clothing. Either in the design or the decoration of the clothing. Lynnie Pinnie has long been a fan of the mermaid and has a variety of designs that will allow you to add a mermaid theme to any piece of clothing. Whether you want a mermaid princess or a mermaid themed monogram frame, we have you covered.

Halloween Décor Ideas

Halloween is a fun holiday for a lot of reasons, one being that it’s a great reason to decorate! And yes, sometimes that decoration is crazy spider webs and smoking punch, but Lynnie Pinnie has a lot of great Halloween themed designs to help you make your space suitably Halloween themed. Here are some ideas for Halloween decoration featuring Lynnie Pinnie Halloween designs.

This adorable pumpkin trio would be great for a Halloween or Fall themed table runner. It could run along the edges or be sewn at intervals across the entire surface of the runner.

There’s a certain movie coming out September 30 that a lot of people are eagerly anticipating. If you’re thinking of having a watch party and want to create some suitable decorations, Lynnie Pinnie can help. We have a variety of witch sisters designs, but this one is a particular favorite. Imagine how cute it would be as a wall hanging, or embroidered on cloth napkins.

This next design gets my vote for cutest way to keep your trick or treaters safe while they’re out getting their sugar haul. This design would be cute if it were embroidered in glow in the dark or reflective thread on trick or treat bags. Safety is always important while the little ones are out trick or treating, and having bags which make them more visible would definitely help with that.

The next design could be a fun way to gain admittance to a haunted house or corn maze. Or maybe tokens to win toward prizes at a Halloween party. Badges of bravery for surviving the terrors of a haunted house? The options are endless with these fun Halloween themed badges.

We all know that Halloween is about two things, dressing up and candy. Why not stop beating around the bush and give your little ghosts and goblins a trick or treat bag that states their true allegiance? This bag takes all the questions out of the equation.

If you have a child that’s a bit shy, or one who’s non-verbal, saying Trick or Treat may not be something they’re able to do. In those cases, this design does the talking for them. Embroider it on a trick or treat bag, and they can simply show it. This could also be a great design to go on party favors for bags of candy at a Halloween party.

And finally, we have this adorable treat pocket witch, who is holding her share of the tasty Halloween treats. A perfect Halloween party favor, this could also be a great way to distribute treats to your child’s classmates. Another option for this would be to add store or company names, and sell them to companies participating in civic trick or treat activities.

How to stitch Lynnie Pinnie Faux Chenille Fonts and Designs

Supplies needed:

  • Purchase this font and other chenille fonts and designs HERE
  • HTV: Heat transfer vinyl (Cricut brand iron on was used in this sample – available in many big box and craft stores). PEEL OFF PLASTIC CARRIER SHEET BEFORE STITCHING. Glitter and flocked vinyl are the easiest to tear away. We do not recommend smooth.
  • Tape
  • Your choice of embroidery thread, garment or blank, and appropriate stabilizer for your garment or blank. This is a dense font that you will need to stabilize well.
  • Optional – vinyl weeding tool
  • Optional – embroidery software. I used Embrilliance Essentials to set up my lettering, color sort my design, and print a template.
Heat Transfer vinyl. You will need to peel away the plastic carrier sheet before stitching.
My printed template and heat transfer vinyl with carrier sheet peeled back.

Let’s get stitching!

I hooped and stabilized my garment, and then stitched step 1, my placement stitch, in a color that closely matches the HTV.

Next, I laid the HTV over the placement stitch, making sure to cover all of the placement stitches. I used a bit of tape to hold it in place because the embroidery machine needle tends to lift and move the HTV. The HTV plastic carrier sheet has been removed.

The next step will be your tack down stitch. I used the same thread color again.

If you are stitching the larger faux chenille designs, stitches will go over the HTV to prevent bubbling so its important that your thread is a close color match.

After the vinyl was tacked down, I used my choice of thread colors for the letters and outlines.

The final stitch will be an outline around the letters. Again, I used a thread color that matches the HTV.

Now for the fun part!

Carefully peel away the excess HTV. You can use a vinyl weeding tool to help with small areas. If you stitch this font in a smaller size, like I did, you can leave the small areas that are inside the holes, for example, inside the letter “E”, or you can weed them out. It’s up to you!

Examples of small areas are circled in pink. Leave them or remove them – your choice!
Excess vinyl pulls away, no scissors or trimming required!

Final step – don’t skip this!

Once you have removed all of the excess vinyl, follow the instructions on the vinyl package to fuse the HTV to your garment or blank with a heat press or iron. USE A TEFLON SHEET OR PRESSING CLOTH TO PROTECT THE EMBROIDERY!

All done!

This font is such a great way to achieve a look that would be otherwise impossible (or at least VERY difficult) in a smaller size. Yes, it is a dense, higher stitch count design but personally, I would rather let the machine stitch this out than try to trim a piece of fabric this small with scissors. NO THANKS!

The stitches lie flat – the faux chenille look is achieved with a unique stitch pattern.

Feel free to Contact Us with any questions.

Happy Stitching!

The History of Mardi Gras

According to the site Mardi Gras New Orleans, the origins of Mardi Gras are centered in medieval Europe, passing through Rome and Venice and landing in France. When the French came to the new world to colonize parts of North America, Mardi Gras came along for the ride. It landed in what would one day become the state of Louisiana, and the first named spot in that state was first called “Pointe du Mardi Gras”. This was in 1699.

By 1718, New Orleans was founded and by 1730, Mardi Gras was celebrated openly. At this time, however, they didn’t celebrate by throwing beads, having giant parades and drinking a lot. Instead, the were very French, and celebrated with elegant and elaborate balls, suitable for a Mardi Gras princess. The affairs were the model for the New Orleans Mardi Gras balls that still continue today.

It wasn’t until 1781 that the first reference to a Mardi Gras “carnival” appeared. By the late 1830s, there were processions with flaming torches and maskers with carriages as well as riders on horseback. In 1856, the Mistick Krewe of Comus was formed, the members of this krewe were always anonymous, and the krewe was known for its elaborate and dazzling floats.

If, for you, the fun of Mardi Gras has always been the “throws” of beads and other items, you would have had to wait until 1870 to get in on that action. The King of Mardi Gras, Rex, would appear for the first time in 1872 and that was also the year that the official Mardi Gras Colors of purple, green and gold were introduced, oddly enough, to honor a Russian Grand Duke.

In 2022, Mardi Gras begins on March 1, so you still have some time to outfit your krewe. Whether you’re catching beads, eating a king cake, or simply like purple, gold and green, Lynnie Pinnie has the Mardi Gras designs you need!

Words and Sayings

I’m a writer, so I don’t suppose it’s a surprise that one of the first categories of designs I was attracted to was the words and sayings category. I’m a big fan of the marriage of words and images, and Lynnie Pinnie has some really cute and fun designs that are just that. Since the site also has an enormous back catalog of designs (1600 I believe I was told was the number) posts like this also help point out some applique designs, and design categories, that you might otherwise have missed.

The “Naturally Sweet” and “Berry Adorable” designs take cute fruit to a whole new level. Continuing our theme of cute food, and also a possible adorable Valentine’s Day design, we have the “Sweetie Pie” heart applique. If you feel strongly about eating your veggies, you might want to go for the “Corn Maze Cutie” filled embroidery design. Clearly, at Lynnie Pinnie, we like adorable food.

For those who are working with religious themes, Lynnie Pinnie has a variety of word art combinations based on Bible verses and religious themes. If John 3:16 is a favorite verse, Lynnie Pinnie has it available in a word art machine embroidery design file and in a vintage Colorwork Sketch file. Proverbs 3.5 is the Scripture quoted in Tribal Arrows word art applique. You can also find Psalm 139.14 in the same Tribal Arrows word art applique design. Finally, we have the Blessed Nation, Psalm 33:12 in an applique.

While we know that boys can like dolls and girls can play football, there are just some designs that seem to lend themselves more to one gender than another. If you’re looking for “boy” designs, Lynnie Pinnie has some cute ones on offer. The “Touchdown” football applique would be adorable on the shirt you make for your future quarterback or wide receiver. The “Bro” appliques for little brother, middle brother and big brother, would be perfect for a family portrait, or as a way to introduce a new sibling. And if you have recently had a new little boy arrive, the “Thank Heaven for Little Boys” clothesline applique could be the perfect decoration for his onsie.

Photographing Embroidery

If you run an online business, one of the most important pieces of the puzzle when it comes to selling is the photography of your products. Pictures that are out of focus, or fuzzy, or poorly lit, or just badly staged can sabotage sales in a way that can see your bottom line leaking red ink. Bad pictures can kill a good website design. The saying “A picture is worth a thousand words” is a saying for a reason. A good picture can sell your products in a way paragraphs of copy cannot (and I say that as someone who writes for a living and loves words). So, given that we know good product photos are important, the question becomes how do we get the best photos possible? That’s what I want to talk about a little bit today.

The first thing is to make sure you start with the best finished product you can create. That means you’ve trimmed any strings and gotten rid of any loose threads. If you’re photographing embroidery on a garment, make sure the garment is wrinkle and stain free. When planning a design/garment combo that you know you’re making to photograph, you also might want to take into account the interaction of fabric and thread. You want the end result to be one that is harmonious, but also something that showcases the embroidery work you’ve done. So take that into account.

The next thing is to create a photo backdrop. Some people will have a variety of these based on color or pattern, other people just go with something simple like a standard white backdrop. These backdrops can be purchased ready made, or can be created using contact paper or photography paper and large pieces of cardboard. You may want a couple of these backdrops. One to put under the product and one to put behind it.

After you’ve got your backdrop set up, the next task is to light your product. Good lighting is a must for good photography. Luckily, certainly since the days when the pandemic began, there are a wide range of lighting options in a wide range of prices. You can opt for something simple like a ring light, or you can purchase lights designed specifically for photography. A lot depends on your budget, how many photos you think you’ll be taking and the cost of what you’re selling. It goes without saying that you should purchase the best lighting option you can, but it’s not worth investing hundreds of dollars in lighting if your products only sell for twenty dollars or less. Even a basic lighting option is likely to be able to do the job.

After your product is staged and lit, you need to figure out what you’ll use to take the picture. Back in the day, an expensive camera was deemed the best tool for the job and in some cases, an expensive digital camera might be your best option. For a lot of businesses, however, the camera on your mobile phone can capture pictures that will be more than useful. Given how much technology has progressed and the quality of cellphone cameras, it’s entirely possible you won’t need more than your phone to get quality pictures.

Finally, after you’ve figured out your backdrop, lighting and camera options, the last thing is to stage your picture. How you stage things depends somewhat on where you’re selling. If you’re photographing things for your own website, you may just want a straightforward product shot with nothing extra stealing focus from the item you’re selling. Those who sell on Etsy and other platforms of that type may wish to add props in the photo with their product, creating more of a lifestyle picture than a simple photo of one product. Staging your product can create more interesting pictures, but avoid getting so elaborate that you obscure whatever item is for sale.

Some Designs for Winter

Since it’s just too cold here today – 14 degrees in Northern Michigan last I checked, I thought it might be fun to spotlight some of the cute winter themed designs that LynniePinnie offers. It may not be scientifically proven, but I’m sure that cuteness keeps us warm when it’s cold out. And where can you find more cuteness than on LynniePinnie.com?

First up, if you have or know a child that’s into princesses, we have a variety of winter theme princess and queen designs on offer. This winter queen design seems to have a bit of a Frozen vibe to it, if you ask me. I’m fond of this winter princess because she’s wearing a purple cloak and purple is my favorite color. You can also use this design set of seven mini princesses to make an adorable border on a top or blanket.

If you’re into gnomes, which a lot of people seem to be into these days, we have designs that will delight your gnome loving hearts. There’s this design of a gnome with a cute winter hat. Or there’s a lady gnome with cute braids and a hat that’s almost as big as she is. If you like your gnomes of the big bearded persuasion, we have you covered there too. I think this gnome has the bushiest gnome beard I’ve ever seen.

For those who are getting a head start on Valentines Day embroidery, we also feature some fancy heart designs that would enhance any Valentine’s Day theme. The motif fill swirl hearts add a bit of fancy to your embroidery. If your Valentine is more the warm weather type, this heart with palm trees may be just the ticket. This patterned heart sketch design would look adorable on a quilt or baby blanket.

If, for you, winter is all about the beauty of nature, these scribble stitch trees may suit your fancy. Or maybe this adorable snowy deer blanket stitch design needs to be added to a shirt or blanket for someone special. This moose with hearts on his antlers can be a twofer and cover both winter and Valentine’s Day. An adorable vintage winter fox could make a great addition to a mug rug or sweatshirt. Or maybe on a scarf.

Honestly, I could go on and on, but there are so many designs in the LynniePinnie catalog that we’d be here for days. The best bet is to use the search function and search whatever theme you need. My guess is that you’ll find tons of designs to suit your taste and your budget. And, keep reading this blog, as I’ll be back occasionally to spotlight some designs and suggest some options.

Free Embroidery Software to type embroidery alphabets as keyboard fonts!

Click HERE to download Embrilliance Express Mode for Windows or MacOSX

I’ve heard from so many new and experienced embroiderers who are frustrated that embroidery “fonts” are really just individual stitch files. They feel limited by their machines and software that require them to add each individual letter file and then struggle to line them up.

The good news is that the folks over at Embrilliance have come up with a solution and even better – it’s FREE!

Step 1. Click HERE to download Embrilliance Express Mode for Windows or MacOSX

Step 2. The program includes a basic block font. You can add more fonts by downloading any of our Embroidery Fonts HERE.

Step 3. after downloading and unzipping the font, open the BX folder.


Step 4. Open the Embrilliance program

Step 5. Save as your embroidery format.

Step 6. File is ready to send to your machine.

Happy Stitching!

Machine Embroidery with Iridescent Cellophane (aka mylar)

We just returned from the Applique Getaway where we had our newest bundle designs on display and they had everyone ooooh-ing and ahhh-ing! 

Just look at that sparkle!

It’s not metallic thread or a specialty product — it’s iridescent polypropylene, also known as Mylar film. Mylar is iridescent cellophane, found in most craft stores in the gift wrap section and online.  Simply stitch over it and tear away when done.  It can be washed and dried on low but no ironing or high heat.  The designs on our website are specially digitized for POPS of mylar sparkle or simply skip the mylar step for a super cute sketchy filled design!

Simply stitch over the mylar film and it easily tears away when finished.

Find Mylar at your local Michael’s
or Hobby Lobby or Amazon

Iridescent Prisma Basket Wrap

See our mylar designs HERE

Happy Stitching!

Website:  www.LynniePinnie.com

Facebook

Facebook Group (freebies!):

Newsletter (more freebies!)