How to Photograph Products

A good product photograph may be one of the greatest selling tools you have, but getting a good photograph isn’t always as easy as we want it to be. Lighting plays a role. Staging plays a role. There are so many factors that go into not just making a photograph good, but making it one that sells a product. If you’re working to photograph your work for your business, here are some tips to help you get the best photos possible.

First up, keep in mind that it is possible to get a good, usuable product photo from a smartphone, if your smartphone has a good camera. If you plan to use your phone to take product photos on a regular basis, it’s wise to do research on cellphone cameras before you buy your phone. According to Digital Camera World, in 2023, the cellphone brands with the best cameras are Google Pixel 7 Pro, the Samsung Galaxy S23 Ultra, and the Apple iPhone 14 Pro. If you want to take product photos with your phone often, it’s best to invest in one with the best camera that you can afford.

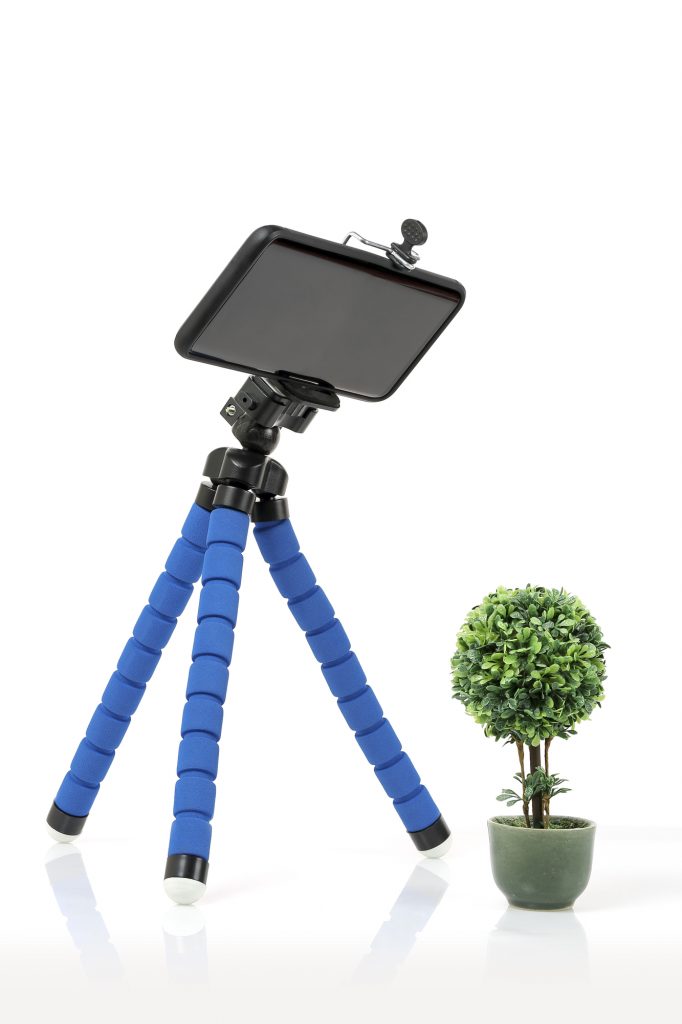
Next, whether you’re using a smartphone or a digital camera, invest in a sturdy tripod. While we all want to think we can hold things perfectly steady, that isn’t always the case. A tripod eliminates any wiggle or shake, even the most miniscule one, and ensures that you’ll have clear, in focus, blur free product photos every time. You can find a mini tripod on Amazon for $20 or less.

Once you have the method for taking the picture set, it’s time to stage your photo. What this means, essentially, is that you’re building the story you want your photo to tell. First, have a good neutral backdrop, which won’t interfere or compete with the product you’re showcasing. Next, build your atmosphere. Include the props you want to use, which should also be designed to be complimentary to and to showcase the main product. If you’re showcasing a baby onsie, maybe you have stuffed animals in the picture, or a baby carriage. If it’s embroidered rain boots, maybe you have an umbrella. The idea is to help set the scene in the viewer’s mind and get them thinking about how they’d use the item you’re showcasing.

It is important to have good light for your photos. Moody lighting has its place, but you want to avoid having photos that look dark, or photos that are so bright everything looks washed out. Your best bet, if possible, is to shoot in a room with lots of natural light. This 6 step tutorial from Shopify should help you use natural lighting for your product shots.

Keep in mind that shooting photos from different angles can help your customers get a full overview of the product. Generally, there are five angles that are useful. Eye level is looking straight at the product. High angle shows the product as if you were looking down at it from an angle. Low angle is the view as if you were looking up from the floor. Bird’s eye, as the name implies, is the view as if you were flying overhead. Lastly, slanted shows the product from one side.

Finally, remember that you can do a lot to create great photos with editing. You can color balance, add brightness, crop out items you don’t want or need and use a variety of other editing tricks to improve photos. If you’re a novice when it comes to editing pictures, this article may give you some useful tips.

Copyright and Digitized Designs

If you’ve been in the world of machine embroidery for any length of time, you’ve probably heard at least one story about a company who was using and selling items with designs which they didn’t have the rights to use, and who was caught. Maybe it’s the story of the day care that had a mural painted using Disney characters and was sued. Maybe it’s the screen print shop using an NFL team’s logo who had their merchandise seized. Copyright is a huge issue, and violating a copyright can have big, and expensive consequences. Even if you think your business is small, and using a design you don’t have the right to use won’t be noticed, or even if you believe one of the myths about copyright that are floating around the industry, the hard fact is that using a design to which you don’t have the rights can mean fines, jail time and even the loss of your business. To make sure you stay on the right side of the copyright issue, you need to know the facts.

The first fact to know is that sharing designs is illegal. Even if you legally bought the design and the rights to use it, posting it in a group for others to download, or sharing it with friends so they can use it is breaking copyright and against the law. So all those Facebook groups or design sharing sites you might find online are essentially full of criminals. The bottom line is this: if you didn’t pay for the design and purchase the rights to use it, then you have no right to use it, and you’re breaking the law if you do. You’re also stealing income from the person who made the design. So just don’t do it.

Let’s talk for a moment about what is meant when we talk about “rights”. When you legally purchase a design from a designer, they grant you certain rights in regard to how the design can be used, whether it can be used on items which you sell and other provisions regarding the design. LynniePinnie’s terms of use are pretty standard detailing what you may and may not do with the designs you purchase, and even with the associated images. Staying within these guidelines means you’re using the designs as intended. Straying outside them means you’re breaking the law.

You should also be aware that a lot of the myths about copyright that are heard often around the industry are not true. There is no percentage rule that allows you to change a copyrighted design by that percentage to avoid violating copyright. There is also no avoiding copyright issues if you are creating something for your own use and not for sale. Most design licenses will specify how the design can be used, some may authorize use on items which will be sold, other designs may specify for personal use only and not for sale items. Basically, the safest thing to do is to legally buy the design and follow the terms of use as specified by the design creator.

Finally, if you’re wondering if you can also if you can trademark the position and arrangement of the designs you purchase on a piece of clothing, the short answer is yes. In Star Athletica v. Varsity Brands the Supreme Court ruled that two dimensional designs on the surface of clothing are protectable by copyright. This includes combinations, positioning and arrangements of shapes, colors and lines.

Obviously, this is a very basic overview or copyright law and what it entails. If you would like more information on this issue, this article by Gordon Firemark, a lawyer in Los Angeles who deals extensively with this issue, is a good place to start. As a general rule, however, the easiest way to avoid infringing on a copyright is to legally purchase all the designs you use and to be aware of the terms of use for those designs.

Where to Sell Your Work

For some people who do embroidery, one of the prime venues for selling what they make can be craft fairs or trade shows. Such events can be a great option for sales, but they also take a lot of work. There may be a booth or a table to set up. All the stock needs to be transported. Depending on the set-up, you might be on your feet for hours and hours. And then, when the event is over, all the merchandise that didn’t sell has to be repacked, the set-up has to pulled down and loaded up, and it all has to go back to your workspace, to be unpacked, sorted and stored. That can be a lot of work, and it’s not necessarily work that everyone wants to do or can do. If that’s your situation, here are some ideas for places you can sell that might suit you better.

Etsy – Most people who embroider and familiar with Etsy. If, by some chance you aren’t, Etsy is a marketplace that specializes in vintage and handmade items. It’s a place where a lot of designers, artisans and creators sell. For some, it can be a very fertile platform for sales. Just be aware that Etsy does have fees and rules and that it may not suit everyone. Still, it does have the advantage of a dedicated customer base, and a platform that is known and trusted. Just do your research before deciding if this platform is right for you. Make sure you fully understand all the fees and requirements.

Facebook/Instagram Shops – If you are on social media, specifically Facebook or Instagram, having a shop on your profile or page might be a good option for you. This option is designed to take advantage of traffic you already have on your pages and profiles and allow your customers to buy right on Facebook or Instagram. Keep in mind to utilize this option you will have to add all your products to your desired platform which could be a time consuming process. Your business will also need to be eligible to set up a shop.

Create Your Own Site – There are a variety of software packages and sites that can help you create your own online store. Shopify, WooCommerce, and Ecwid to name just a few. The advantage to having your own site is that it’s all under your control. The disadvantage is that it’s all under your control. You have to figure out how to set up payment options. You have to add necessary information and products. You have to figure out where and how to host the site. There is more control over having a site that is yours that you host, but there are also more issues that need to be handled. If you’re not tech savvy or interested in having to deal with the details of setting up a site, this most likely will not be the option for you.

Amazon Handmade – Created as an alternative to Etsy, Amazon Handmade isn’t as well known, but it could be an option for your business. Amazon Handmade is for artisans and has an application process to sell on their platform. They require you have a professional selling account which comes with a fee, and they take 15% of every sale you make. If that doesn’t sound like a great deal, it might not be, except for the fact that selling on this platform does give you access to Amazon’s audience and marketing budget. Read all the fine print, but this might be a good option for some businesses.

Have a Brick and Mortar – Another option for selling product might be to set up a storefront or to work out of your home. The advantage of a storefront is that you might be able to connect and network with other merchants in your town and you will be in a set place to which people can bring the work they want done. A disadvantage is that stores need to be set up and maintained, you will either need to rent or buy space and you need to be there during set hours. Some business owners get around this by working from their homes, but that may entail letting people into your home and sometimes makes work far too easy to access. There are trade offs with either option.

The thing to remember about selling is there’s always a way to do it if you look hard enough. The Internet has made it easier to reach more people than ever before, so it’s just a matter of doing your research, finding the option you think will work best for you and getting started.

Photographing Embroidery

If you run an online business, one of the most important pieces of the puzzle when it comes to selling is the photography of your products. Pictures that are out of focus, or fuzzy, or poorly lit, or just badly staged can sabotage sales in a way that can see your bottom line leaking red ink. Bad pictures can kill a good website design. The saying “A picture is worth a thousand words” is a saying for a reason. A good picture can sell your products in a way paragraphs of copy cannot (and I say that as someone who writes for a living and loves words). So, given that we know good product photos are important, the question becomes how do we get the best photos possible? That’s what I want to talk about a little bit today.

The first thing is to make sure you start with the best finished product you can create. That means you’ve trimmed any strings and gotten rid of any loose threads. If you’re photographing embroidery on a garment, make sure the garment is wrinkle and stain free. When planning a design/garment combo that you know you’re making to photograph, you also might want to take into account the interaction of fabric and thread. You want the end result to be one that is harmonious, but also something that showcases the embroidery work you’ve done. So take that into account.

The next thing is to create a photo backdrop. Some people will have a variety of these based on color or pattern, other people just go with something simple like a standard white backdrop. These backdrops can be purchased ready made, or can be created using contact paper or photography paper and large pieces of cardboard. You may want a couple of these backdrops. One to put under the product and one to put behind it.

After you’ve got your backdrop set up, the next task is to light your product. Good lighting is a must for good photography. Luckily, certainly since the days when the pandemic began, there are a wide range of lighting options in a wide range of prices. You can opt for something simple like a ring light, or you can purchase lights designed specifically for photography. A lot depends on your budget, how many photos you think you’ll be taking and the cost of what you’re selling. It goes without saying that you should purchase the best lighting option you can, but it’s not worth investing hundreds of dollars in lighting if your products only sell for twenty dollars or less. Even a basic lighting option is likely to be able to do the job.

After your product is staged and lit, you need to figure out what you’ll use to take the picture. Back in the day, an expensive camera was deemed the best tool for the job and in some cases, an expensive digital camera might be your best option. For a lot of businesses, however, the camera on your mobile phone can capture pictures that will be more than useful. Given how much technology has progressed and the quality of cellphone cameras, it’s entirely possible you won’t need more than your phone to get quality pictures.

Finally, after you’ve figured out your backdrop, lighting and camera options, the last thing is to stage your picture. How you stage things depends somewhat on where you’re selling. If you’re photographing things for your own website, you may just want a straightforward product shot with nothing extra stealing focus from the item you’re selling. Those who sell on Etsy and other platforms of that type may wish to add props in the photo with their product, creating more of a lifestyle picture than a simple photo of one product. Staging your product can create more interesting pictures, but avoid getting so elaborate that you obscure whatever item is for sale.