Fun With Fonts

If you’ve spent even a little bit of time on the Lynnie Pinnie site, you may have noticed we offer a lot of fonts. When I first thought about writing this post, I considered going into the history of fonts and how they’ve changed over the centuries, which led me to the history of printing, and the changes in how the printing process worked and the machines that were used and suddenly I was down a rabbit hole of learning about printing. It was interesting, but not exactly applicable to what we’re doing here. So, I decided, instead, to talk about the types of fonts Lynnie Pinnie offers, and where and why you might want to use them.
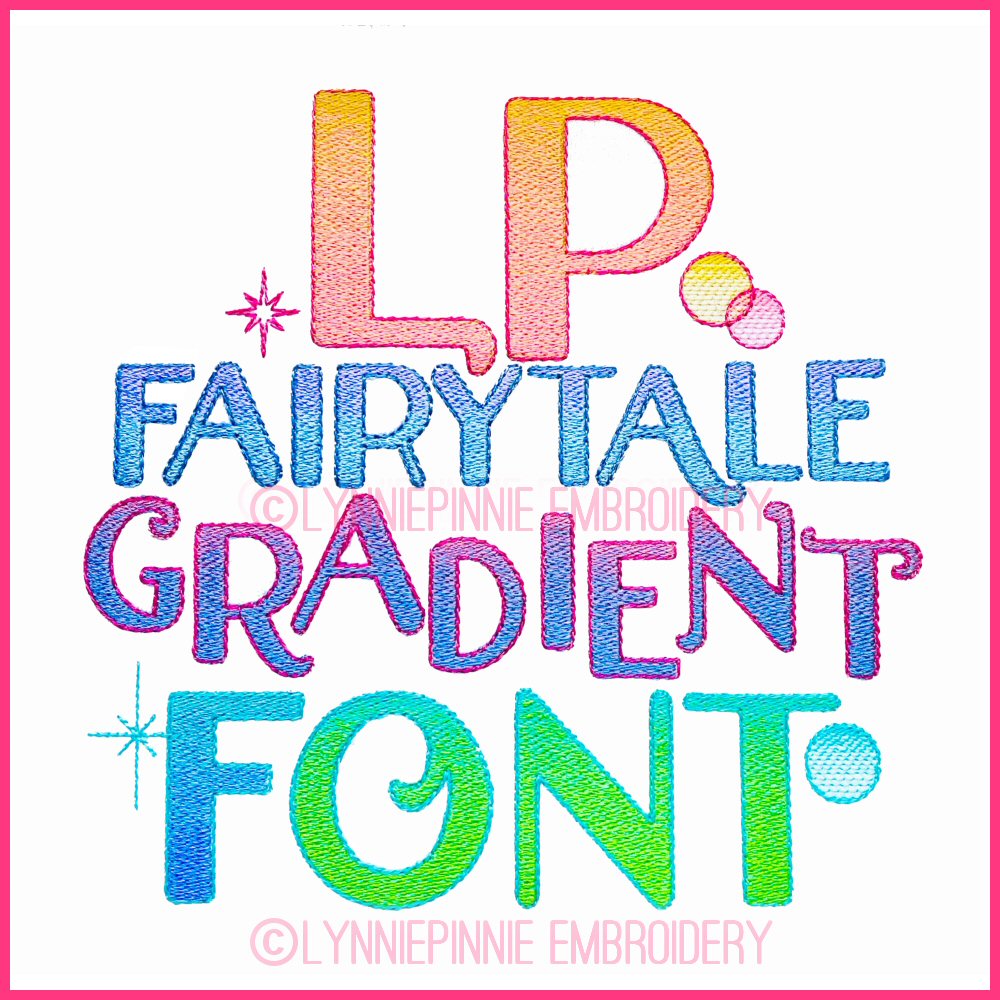
Let’s start first with the Native BX fonts. These fonts are scalable, object based fonts that can be resized without distortion using Embrilliance platform products. Lynnie Pinnie has, to our knowledge anyway, one of the more extensive collections of Native BX fonts, and a wide variety of selections within that one category. Whether you’re looking for something fancy (hello, gradient script font) or something simple like a chain stitch, we have you covered.
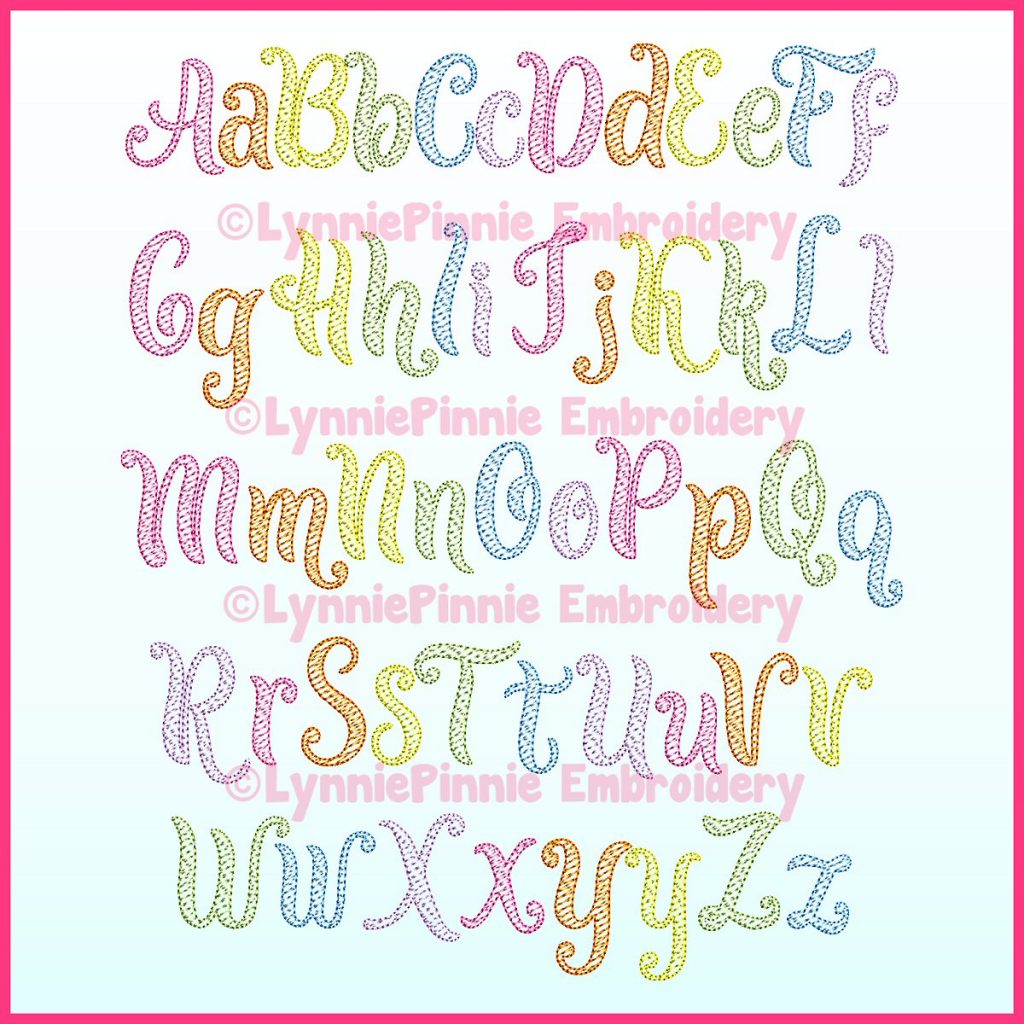
Next up we have our Sketch and Triple Run Fonts. A lot of these fonts look very similar to hand stitching. Most of you may already know this, but sketch fill has a lighter density and fill then a regular fill stitch. The fonts are designed to let a bit of the cloth show through. This is fun if you’re doing an applique with or embroidering on a piece of a amazing fabric and you want the pattern or color of the fabric to show through a little more. Some of my favorite fonts in this category include The Fighter Chain Stitch and the Whimsy Doodle font.
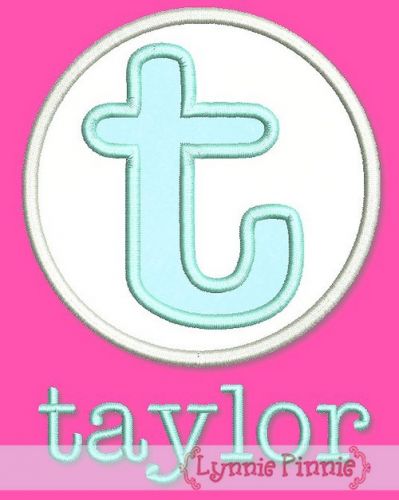
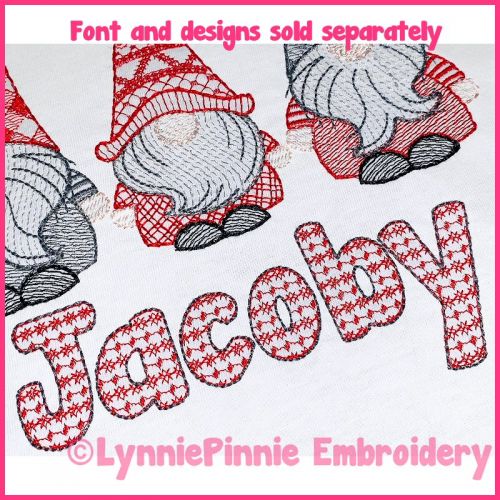
One of the things Lynnie Pinnie is known for is applique designs (the founder of Lynnie Pinnie is also the founder of Applique Getaway, after all) and applique fonts. These type of fonts, as the name implies, are fonts that are designed to be used as appliques. You can use these fonts for monograms, for birthday shirts, really for almost anything for which you’d use a stitched out font. The difference in these fonts is that they include fabric, which allows you to vary their appearance based on the type of fabric you use. The applique also gives a slightly more 3-D appearance and makes the font stand out a bit more. These fonts are a fun change of pace and allow you to do something a little different with lettering.
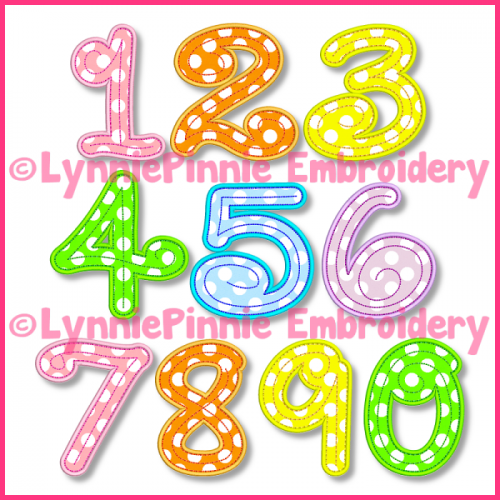
Finally, let’s talk about the number fonts. A lot of these are applique, which makes them perfect for use in the monthly pictures of new babies a lot of people now take. You’ve all seen those, where a baby is posed on a quilt or with pillows or something that shows their age so you can record the progress as the child grows. These number fonts are also great for embroidering shirts for the first day of school, creating a shirt for the birthday boy or girl, or even creating a cute team shirt for your little t-baller or soccer player. Most of these fonts are applique as well, so you have the chance to make them unique by varying the fabric.
Do What You Love

For all that everyone these days seems to be promoting the idea of doing what you love and being who you are, we all know there are also judgy people out there. Especially when it comes to something one group likes and another does not. It could be people who don’t get your love of dark chocolate, or horror movies, or anime. Maybe no one in your orbit understand your fascination with space or superheros or horses. It can be tough when you’re the only one sharing your passion.

At Lynnie Pinnie, we’re a judge free zone. We know that there are as many ways to love things as there are things to love, and we just want to give you the designs that help you celebrate the things that resonate with you. Whatever your passion, or the passion of the little (or big) one who might be wearing or using what you make, we have a design for that.

Say monters are your thing. You love the jump scare, and horror movies where the monster shows up when least expected and scares everyone to death. Or maybe you’re totally in love with Monsters, Inc. and just want to huge Sully or maybe dribble Mike a few times. We get that too. Whether you like your monsters adorable and a little silly or more on the scary side, we’ve got a design to suit your needs.

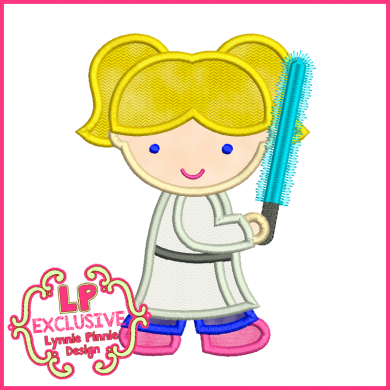
Maybe you’re really into sci-fi and you know all the Star Wars trivia there has ever been or ever will be. Since you loved it so much, you introduced it to your daughter, and now she wants to be a Jedi when she grows up. You may not be able to give her an actual lightsaber, but you can embroider one on a t-shirt for her. It may not make the right sound when swung, but it will still look cool.

Could be you’ve always had a green thumb and your garden is your happy place. You love growing beautiful flowers or tasty veggies, and can’t wait to get outside and play in the dirct once the growing season starts. Whether it’s pumpkins or petunias, we have a variety of nature themed designs to be added to shirts, tote bags or garden aprons. Your love for gardening will be blooming all over your clothes.

Finally, since we’re talking about things we love, I couldn’t resist a plug for Applique Getaway, an entire show built on the love of applique, embroidery and other decoration disciplines. If you want to meet your tribe and spend time with people who geek out over designs, thread and the cool things you can do with them, as much as you do, AG is the place to be. Registration is now open, so come join us!

Halloween Décor Ideas

Halloween is a fun holiday for a lot of reasons, one being that it’s a great reason to decorate! And yes, sometimes that decoration is crazy spider webs and smoking punch, but Lynnie Pinnie has a lot of great Halloween themed designs to help you make your space suitably Halloween themed. Here are some ideas for Halloween decoration featuring Lynnie Pinnie Halloween designs.

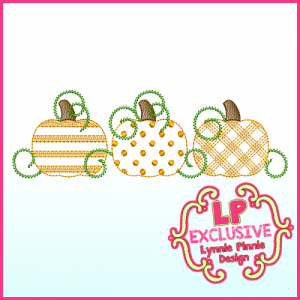
This adorable pumpkin trio would be great for a Halloween or Fall themed table runner. It could run along the edges or be sewn at intervals across the entire surface of the runner.

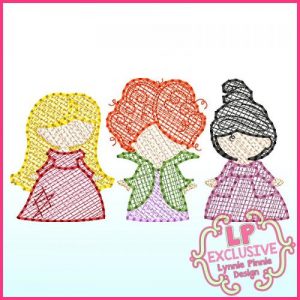
There’s a certain movie coming out September 30 that a lot of people are eagerly anticipating. If you’re thinking of having a watch party and want to create some suitable decorations, Lynnie Pinnie can help. We have a variety of witch sisters designs, but this one is a particular favorite. Imagine how cute it would be as a wall hanging, or embroidered on cloth napkins.

This next design gets my vote for cutest way to keep your trick or treaters safe while they’re out getting their sugar haul. This design would be cute if it were embroidered in glow in the dark or reflective thread on trick or treat bags. Safety is always important while the little ones are out trick or treating, and having bags which make them more visible would definitely help with that.

The next design could be a fun way to gain admittance to a haunted house or corn maze. Or maybe tokens to win toward prizes at a Halloween party. Badges of bravery for surviving the terrors of a haunted house? The options are endless with these fun Halloween themed badges.

We all know that Halloween is about two things, dressing up and candy. Why not stop beating around the bush and give your little ghosts and goblins a trick or treat bag that states their true allegiance? This bag takes all the questions out of the equation.

If you have a child that’s a bit shy, or one who’s non-verbal, saying Trick or Treat may not be something they’re able to do. In those cases, this design does the talking for them. Embroider it on a trick or treat bag, and they can simply show it. This could also be a great design to go on party favors for bags of candy at a Halloween party.

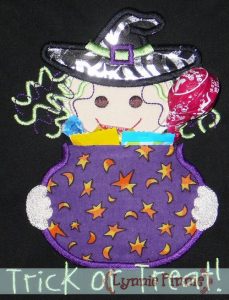
And finally, we have this adorable treat pocket witch, who is holding her share of the tasty Halloween treats. A perfect Halloween party favor, this could also be a great way to distribute treats to your child’s classmates. Another option for this would be to add store or company names, and sell them to companies participating in civic trick or treat activities.

How to stitch Lynnie Pinnie Faux Chenille Fonts and Designs

Supplies needed:

  • Purchase this font and other chenille fonts and designs HERE
  • HTV: Heat transfer vinyl (Cricut brand iron on was used in this sample – available in many big box and craft stores). PEEL OFF PLASTIC CARRIER SHEET BEFORE STITCHING. Glitter and flocked vinyl are the easiest to tear away. We do not recommend smooth.
  • Tape
  • Your choice of embroidery thread, garment or blank, and appropriate stabilizer for your garment or blank. This is a dense font that you will need to stabilize well.
  • Optional – vinyl weeding tool
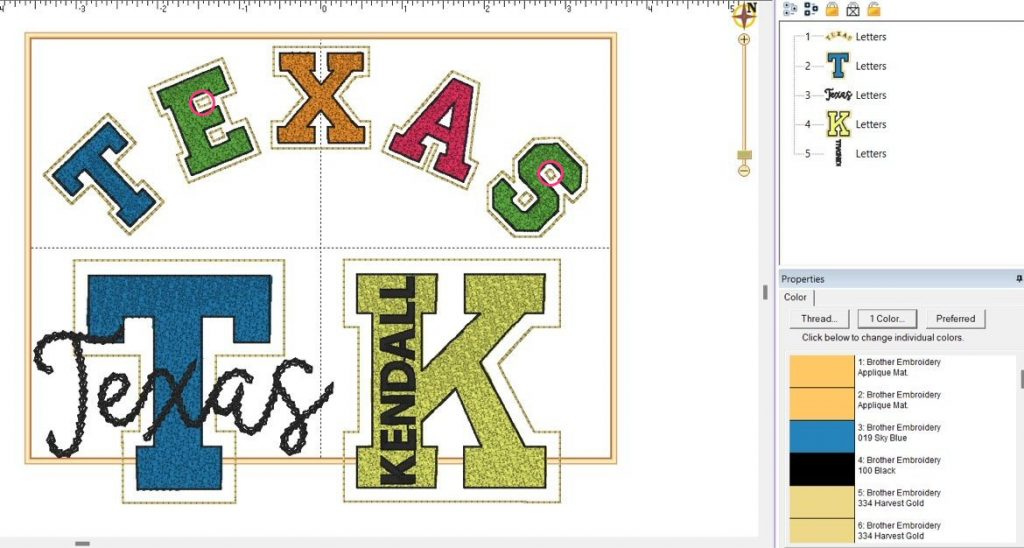
  • Optional – embroidery software. I used Embrilliance Essentials to set up my lettering, color sort my design, and print a template.
Heat Transfer vinyl. You will need to peel away the plastic carrier sheet before stitching.
My printed template and heat transfer vinyl with carrier sheet peeled back.

Let’s get stitching!

I hooped and stabilized my garment, and then stitched step 1, my placement stitch, in a color that closely matches the HTV.

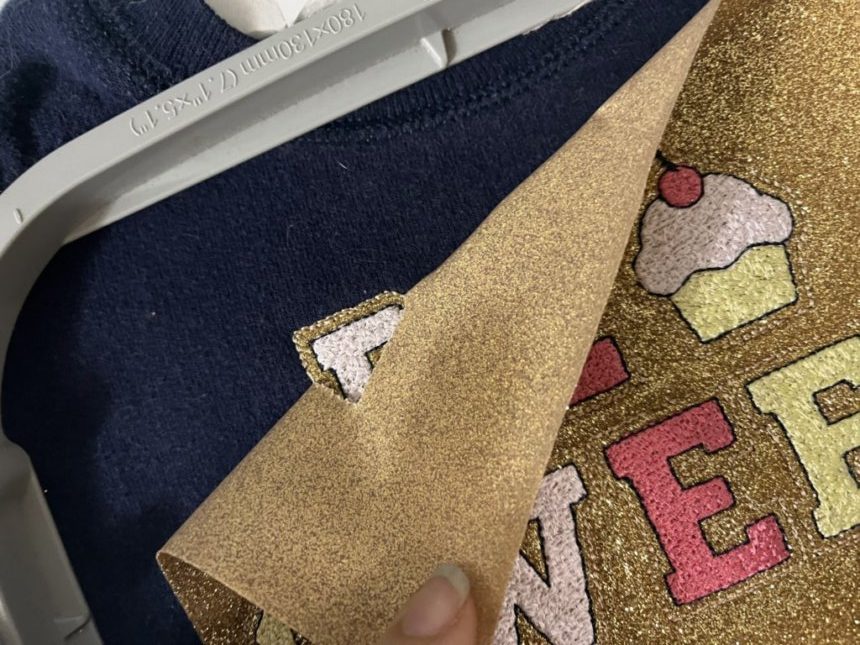
Next, I laid the HTV over the placement stitch, making sure to cover all of the placement stitches. I used a bit of tape to hold it in place because the embroidery machine needle tends to lift and move the HTV. The HTV plastic carrier sheet has been removed.

The next step will be your tack down stitch. I used the same thread color again.

If you are stitching the larger faux chenille designs, stitches will go over the HTV to prevent bubbling so its important that your thread is a close color match.

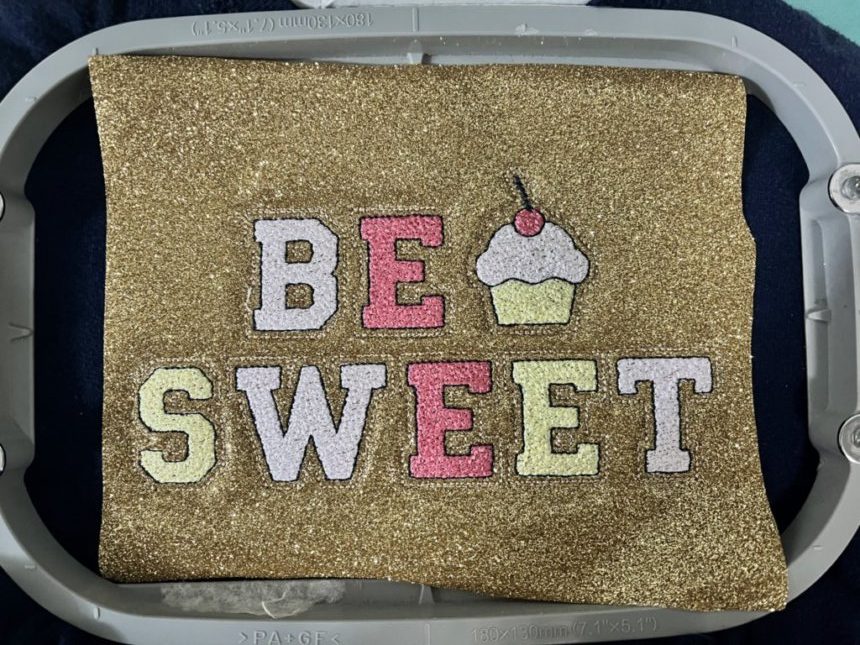
After the vinyl was tacked down, I used my choice of thread colors for the letters and outlines.

The final stitch will be an outline around the letters. Again, I used a thread color that matches the HTV.

Now for the fun part!

Carefully peel away the excess HTV. You can use a vinyl weeding tool to help with small areas. If you stitch this font in a smaller size, like I did, you can leave the small areas that are inside the holes, for example, inside the letter “E”, or you can weed them out. It’s up to you!

Examples of small areas are circled in pink. Leave them or remove them – your choice!
Excess vinyl pulls away, no scissors or trimming required!

Final step – don’t skip this!

Once you have removed all of the excess vinyl, follow the instructions on the vinyl package to fuse the HTV to your garment or blank with a heat press or iron. USE A TEFLON SHEET OR PRESSING CLOTH TO PROTECT THE EMBROIDERY!

All done!

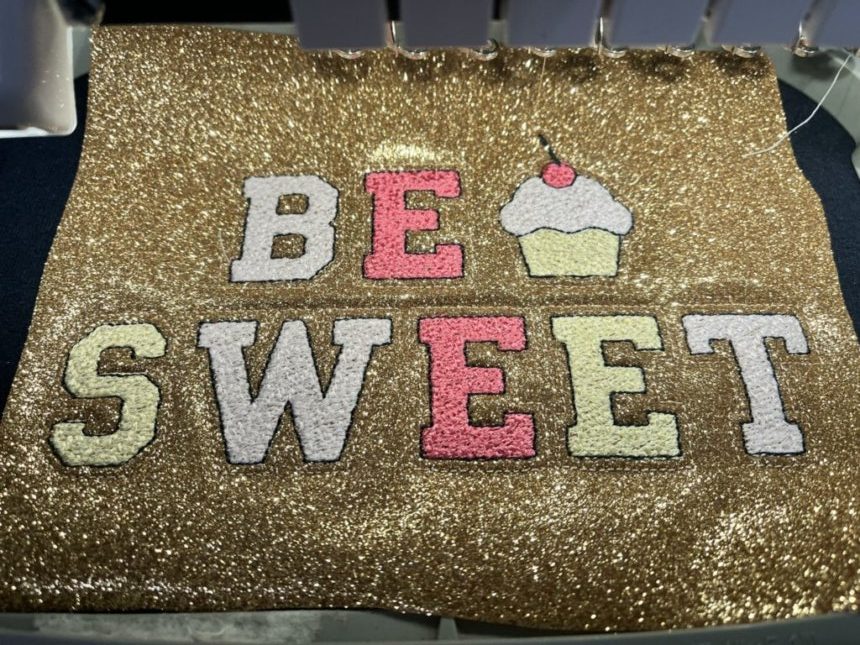
This font is such a great way to achieve a look that would be otherwise impossible (or at least VERY difficult) in a smaller size. Yes, it is a dense, higher stitch count design but personally, I would rather let the machine stitch this out than try to trim a piece of fabric this small with scissors. NO THANKS!

The stitches lie flat – the faux chenille look is achieved with a unique stitch pattern.

Feel free to Contact Us with any questions.

Happy Stitching!

5 Reasons to Buy from LynniePinnie

When you ask people about LynniePinnie designs, the words you hear used to describe those designs are words like “adorable” or “whimsical” or “magical”. While it’s true that the designs are adorable, and whimsical, and magical, there also many more reasons why purchasing a LynniePinnie design is a good idea.

Reason #1: LynniePinnie Knows Embroidery – Lyndsie Salcido, the designer behind LynniePinnie began as an embroiderer. She knows how to run a machine. She understands the despair of your thread or bobbin running out before the design is finished stitching. Lyndsie has experienced the pain of poorly digitized and conceived designs that stitch out slowly or are sloppy in execution. Because she’s run an embroidery business, she understands that designs need to work, so that the machine can run and profit, or a cute gift for a friend or family member can be made.

Reason #2: LynniePinnie Knows Materials – One of the not so well kept secrets of embroidery is that thread and stabilizer and fabric and design all come together in a marriage that will hopefully create an attractive finished piece. Part of the work of being a good digitizer is understanding how all the separate parts come together and interact. The weight of the fabric matters. The weight of the thread matters. The type of stabilizer used can have an impact. Digitizers who understand more than just how the stitches will be stitched into the substrate are digitizers who will create designs that will run more smoothly and much faster.

Reason #3: LynniePinnie Knows It Matters – When you buy a design, whether it’s something you plan to use on a garment you’ve sold to a client, or if you’re making a new shirt for your daughter or son, you want that design to sew out cleanly and smoothly without errors or issues. Thread breaks, excess stitches, sloppy digitizing that results in a sloppy finished product, all those things waste your time, your supplies and your money. Creating designs that are well digitized takes effort and time, but the end result is a design that sews out how you want it to, when you want it to, and that’s what’s important. Yes, it takes more effort on LynniePinnie’s end, but it puts a better finished product in the hands of our customers, and that’s what counts.

Reason #4: LynniePinnie Knows Creativity – Resting on your laurels is for those who aren’t always trying to be better today than they were yesterday. Lyndsie is continually trying new processes and developing new designs and projects to take machine embroidery to the next level. The goal is always to stay current and to improve on what has come before. LynniePinnie also strives to find new ways to enhance the process of machine embroidery. Same old/same old will never do here. We want to stay on the cutting edge of decoration techniques and embroidery trends, and we make an effort to do so.

Reason #5: LynnniePinnie Loves Digitizing (And Our Customers) – The art and craft of digitizing is not for everyone. It requires a pretty specific skill set. For our designer, Lyndsie, creating a new design is both a challenge and a labor of love, and the designs reflect that love. There’s no sloppiness, no cutting corners, no work that we can’t be proud to offer to you, our customers. Yes, the designs may sometimes cost a little more, and yes, design releases may take a bit more time, but the end result is well worth the effort and the money. While we don’t, as some creatives do, put a “Made with Love” label on each design we sell, the love is still there, in the effort put in to creating the design, and in the care that is taken to make sure the design works at the highest level to meet our customers’ needs.

Copyright and Digitized Designs

If you’ve been in the world of machine embroidery for any length of time, you’ve probably heard at least one story about a company who was using and selling items with designs which they didn’t have the rights to use, and who was caught. Maybe it’s the story of the day care that had a mural painted using Disney characters and was sued. Maybe it’s the screen print shop using an NFL team’s logo who had their merchandise seized. Copyright is a huge issue, and violating a copyright can have big, and expensive consequences. Even if you think your business is small, and using a design you don’t have the right to use won’t be noticed, or even if you believe one of the myths about copyright that are floating around the industry, the hard fact is that using a design to which you don’t have the rights can mean fines, jail time and even the loss of your business. To make sure you stay on the right side of the copyright issue, you need to know the facts.

The first fact to know is that sharing designs is illegal. Even if you legally bought the design and the rights to use it, posting it in a group for others to download, or sharing it with friends so they can use it is breaking copyright and against the law. So all those Facebook groups or design sharing sites you might find online are essentially full of criminals. The bottom line is this: if you didn’t pay for the design and purchase the rights to use it, then you have no right to use it, and you’re breaking the law if you do. You’re also stealing income from the person who made the design. So just don’t do it.

Let’s talk for a moment about what is meant when we talk about “rights”. When you legally purchase a design from a designer, they grant you certain rights in regard to how the design can be used, whether it can be used on items which you sell and other provisions regarding the design. LynniePinnie’s terms of use are pretty standard detailing what you may and may not do with the designs you purchase, and even with the associated images. Staying within these guidelines means you’re using the designs as intended. Straying outside them means you’re breaking the law.

You should also be aware that a lot of the myths about copyright that are heard often around the industry are not true. There is no percentage rule that allows you to change a copyrighted design by that percentage to avoid violating copyright. There is also no avoiding copyright issues if you are creating something for your own use and not for sale. Most design licenses will specify how the design can be used, some may authorize use on items which will be sold, other designs may specify for personal use only and not for sale items. Basically, the safest thing to do is to legally buy the design and follow the terms of use as specified by the design creator.

Finally, if you’re wondering if you can also if you can trademark the position and arrangement of the designs you purchase on a piece of clothing, the short answer is yes. In Star Athletica v. Varsity Brands the Supreme Court ruled that two dimensional designs on the surface of clothing are protectable by copyright. This includes combinations, positioning and arrangements of shapes, colors and lines.

Obviously, this is a very basic overview or copyright law and what it entails. If you would like more information on this issue, this article by Gordon Firemark, a lawyer in Los Angeles who deals extensively with this issue, is a good place to start. As a general rule, however, the easiest way to avoid infringing on a copyright is to legally purchase all the designs you use and to be aware of the terms of use for those designs.

The History of Mardi Gras

According to the site Mardi Gras New Orleans, the origins of Mardi Gras are centered in medieval Europe, passing through Rome and Venice and landing in France. When the French came to the new world to colonize parts of North America, Mardi Gras came along for the ride. It landed in what would one day become the state of Louisiana, and the first named spot in that state was first called “Pointe du Mardi Gras”. This was in 1699.

By 1718, New Orleans was founded and by 1730, Mardi Gras was celebrated openly. At this time, however, they didn’t celebrate by throwing beads, having giant parades and drinking a lot. Instead, the were very French, and celebrated with elegant and elaborate balls, suitable for a Mardi Gras princess. The affairs were the model for the New Orleans Mardi Gras balls that still continue today.

It wasn’t until 1781 that the first reference to a Mardi Gras “carnival” appeared. By the late 1830s, there were processions with flaming torches and maskers with carriages as well as riders on horseback. In 1856, the Mistick Krewe of Comus was formed, the members of this krewe were always anonymous, and the krewe was known for its elaborate and dazzling floats.

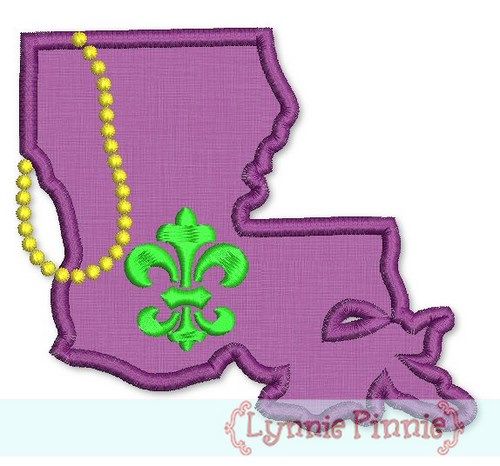
If, for you, the fun of Mardi Gras has always been the “throws” of beads and other items, you would have had to wait until 1870 to get in on that action. The King of Mardi Gras, Rex, would appear for the first time in 1872 and that was also the year that the official Mardi Gras Colors of purple, green and gold were introduced, oddly enough, to honor a Russian Grand Duke.

In 2022, Mardi Gras begins on March 1, so you still have some time to outfit your krewe. Whether you’re catching beads, eating a king cake, or simply like purple, gold and green, Lynnie Pinnie has the Mardi Gras designs you need!

Beginner Machine Embroidery Projects

When you’re just starting out in a new decoration discipline, like, for instance, machine embroidery, everything can be intimidating. You worry about wasting a garment or fabric. There may be some uncertainty about what stabilizer to use. Choosing thread and bobbins may be confusing. For some people, the worry about screwing something up (which happens and is, for most, a normal part of the process) keeps them from ever pressing the start button on their machine at all. Getting the first successful project out of the way can be key to a successful career in machine embroidery. The question is, where to start? This blog post has some suggestions for simple projects that most anyone who is a novice embroiderer should be able to complete fairly quickly and easily.
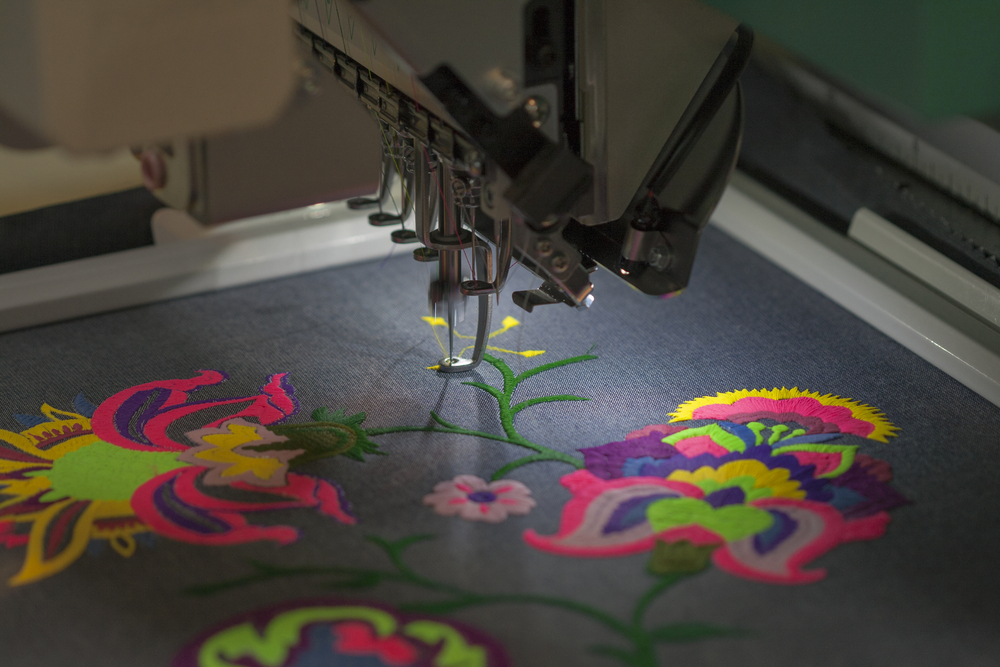
Project # 1: Towels – Towels generally fall into two categories. The first is kitchen towels, which are usually of a lighter weight fabric and generally will have no or very little pile to them. With a linen – like kitchen towel, it will most likely not be necessary to use a topping, a simple stabilizer will do. If you’re interested in doing a cute set of kitchen towels, Lynnie Pinnie has some cute kitchen themed designs and applique options that would be sure to work for your purposes. The other option for a simple towel project would be monogrammed hand towels for a guest bathroom or a housewarming gift. These sorts of towels will have a pile, so you will need to use both a stabilizer and a topping. Hand towels lend themselves nicely to monograms, and you can find some wonderful monogram frames and fonts here on LynniePinnie.com.

Project #2: Burp Cloths – A burp cloth is another easy project and a useful one as well, either as part of a gift set for a new mother at a baby shower, or as something you can embroidery and sell in your online shop. As with towels, burp cloths aren’t generally difficult to hoop and may or may not have a pile, depending on which type you choose to embroider. If you are embroidering a lighter density design, you may be able to use a tearaway stabilizer. Heavier, more dense designs are going to require poly mesh stabilizer or a cutaway. Remember, you want to be sure your stabilizer can handle the stitches in the design because you want to avoid the design puckering when it’s washed. If you think burp cloths might be your niche, Lynnie Pinnie has a variety of baby themed designs that can keep you happily embroidering burp cloths for quite some time.

Project #3: Baby Blankets – Keeping with our theme of easy baby shower gifts, a monogrammed or embroidered baby blanket is a lovely gift for any mother to be or new baby. While blankets might be a slightly more advanced project, they are still fairly simple and easy to embroider. Karlie Belle, one of the lovely instructors at Virtual Applique Getaway this year, has a wonderful step by step tutorial on how to add a name to a baby blanket, that may be helpful for those who have never done this before. And if you’re looking for some adorable applique options to add to a blanket, Lynnie Pinnie has you covered!

Project # 4: A Winter Scarf – Like most of the projects mentioned in this post so far, scarfs are flat, so they’re fairly easy to hoop. They also tend to be made of a substantial fabric, but not too thick, so hooping shouldn’t be too tricky. Scarves also lend themselves nicely to a monogram for a classic look, or to an applique if you’re inclined to get a bit more fancy. If you’re looking for products to sell at craft fairs or online, scarves can be a good bet there as well. As with the other season, winter themed designs are available from Lynnie Pinnie and will be sure to make your scarf project a success.

The main thing to remember when starting out is that mistakes will happen, and that everyone makes them. Don’t let the fear of screwing up a project keep you from learning all that your machine can do. Find tutorials, ask questions in groups (we’re happy to answer questions and help in the Lynnie Pinnie group) and keep practicing with your machine. You’ve invested the money to buy the machine and the time to learn to use it, so don’t let anything hold you back from creating amazing embroidered items!

Photographing Embroidery

If you run an online business, one of the most important pieces of the puzzle when it comes to selling is the photography of your products. Pictures that are out of focus, or fuzzy, or poorly lit, or just badly staged can sabotage sales in a way that can see your bottom line leaking red ink. Bad pictures can kill a good website design. The saying “A picture is worth a thousand words” is a saying for a reason. A good picture can sell your products in a way paragraphs of copy cannot (and I say that as someone who writes for a living and loves words). So, given that we know good product photos are important, the question becomes how do we get the best photos possible? That’s what I want to talk about a little bit today.

The first thing is to make sure you start with the best finished product you can create. That means you’ve trimmed any strings and gotten rid of any loose threads. If you’re photographing embroidery on a garment, make sure the garment is wrinkle and stain free. When planning a design/garment combo that you know you’re making to photograph, you also might want to take into account the interaction of fabric and thread. You want the end result to be one that is harmonious, but also something that showcases the embroidery work you’ve done. So take that into account.

The next thing is to create a photo backdrop. Some people will have a variety of these based on color or pattern, other people just go with something simple like a standard white backdrop. These backdrops can be purchased ready made, or can be created using contact paper or photography paper and large pieces of cardboard. You may want a couple of these backdrops. One to put under the product and one to put behind it.

After you’ve got your backdrop set up, the next task is to light your product. Good lighting is a must for good photography. Luckily, certainly since the days when the pandemic began, there are a wide range of lighting options in a wide range of prices. You can opt for something simple like a ring light, or you can purchase lights designed specifically for photography. A lot depends on your budget, how many photos you think you’ll be taking and the cost of what you’re selling. It goes without saying that you should purchase the best lighting option you can, but it’s not worth investing hundreds of dollars in lighting if your products only sell for twenty dollars or less. Even a basic lighting option is likely to be able to do the job.

After your product is staged and lit, you need to figure out what you’ll use to take the picture. Back in the day, an expensive camera was deemed the best tool for the job and in some cases, an expensive digital camera might be your best option. For a lot of businesses, however, the camera on your mobile phone can capture pictures that will be more than useful. Given how much technology has progressed and the quality of cellphone cameras, it’s entirely possible you won’t need more than your phone to get quality pictures.

Finally, after you’ve figured out your backdrop, lighting and camera options, the last thing is to stage your picture. How you stage things depends somewhat on where you’re selling. If you’re photographing things for your own website, you may just want a straightforward product shot with nothing extra stealing focus from the item you’re selling. Those who sell on Etsy and other platforms of that type may wish to add props in the photo with their product, creating more of a lifestyle picture than a simple photo of one product. Staging your product can create more interesting pictures, but avoid getting so elaborate that you obscure whatever item is for sale.

Some Designs for Winter

Since it’s just too cold here today – 14 degrees in Northern Michigan last I checked, I thought it might be fun to spotlight some of the cute winter themed designs that LynniePinnie offers. It may not be scientifically proven, but I’m sure that cuteness keeps us warm when it’s cold out. And where can you find more cuteness than on LynniePinnie.com?

First up, if you have or know a child that’s into princesses, we have a variety of winter theme princess and queen designs on offer. This winter queen design seems to have a bit of a Frozen vibe to it, if you ask me. I’m fond of this winter princess because she’s wearing a purple cloak and purple is my favorite color. You can also use this design set of seven mini princesses to make an adorable border on a top or blanket.

If you’re into gnomes, which a lot of people seem to be into these days, we have designs that will delight your gnome loving hearts. There’s this design of a gnome with a cute winter hat. Or there’s a lady gnome with cute braids and a hat that’s almost as big as she is. If you like your gnomes of the big bearded persuasion, we have you covered there too. I think this gnome has the bushiest gnome beard I’ve ever seen.

For those who are getting a head start on Valentines Day embroidery, we also feature some fancy heart designs that would enhance any Valentine’s Day theme. The motif fill swirl hearts add a bit of fancy to your embroidery. If your Valentine is more the warm weather type, this heart with palm trees may be just the ticket. This patterned heart sketch design would look adorable on a quilt or baby blanket.

If, for you, winter is all about the beauty of nature, these scribble stitch trees may suit your fancy. Or maybe this adorable snowy deer blanket stitch design needs to be added to a shirt or blanket for someone special. This moose with hearts on his antlers can be a twofer and cover both winter and Valentine’s Day. An adorable vintage winter fox could make a great addition to a mug rug or sweatshirt. Or maybe on a scarf.

Honestly, I could go on and on, but there are so many designs in the LynniePinnie catalog that we’d be here for days. The best bet is to use the search function and search whatever theme you need. My guess is that you’ll find tons of designs to suit your taste and your budget. And, keep reading this blog, as I’ll be back occasionally to spotlight some designs and suggest some options.